Animal toilet paper roll crafts have been one of my go-to creative activities for years, especially on those afternoons when the kids are bored, the weather is not cooperating, and I really don’t want another screen-time battle. There’s something almost magical about turning an “empty” toilet paper roll into a cute little animal that suddenly deserves a name, a personality, and a place on the shelf.
I still remember the first time we tried animal toilet paper roll crafts at our kitchen table. The paint smelled faintly sweet, scraps of paper were everywhere, and somehow we ended up with more glue on our fingers than on the actual craft. But the laughter, the proud smiles, and the “Look what I made!” moments made it instantly worth it.
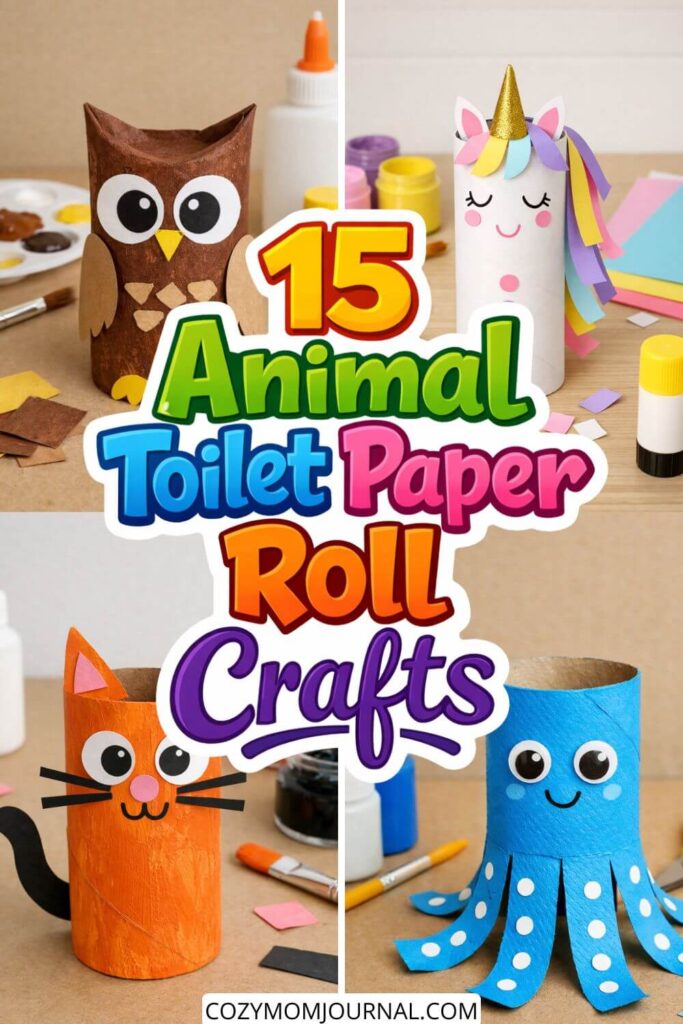
That’s exactly why I love animal toilet paper roll crafts so much. They’re:
- budget-friendly (you already have most supplies at home),
- perfect for small spaces and small tables,
- forgiving if cuts aren’t perfect,
- and easy enough that kids can truly feel independent while creating.
If you’ve ever thought, “I want to do something creative with my kids, but I don’t have time for complicated prep,” you’re in the right place. These animal toilet paper roll crafts are designed to solve that exact problem — simple steps, basic shapes, and materials you probably already have in a drawer.
I also know how overwhelming it can feel to come up with new craft ideas again and again, especially if you live in a small apartment or don’t want glitter stuck in your carpet for the next six months. That’s why I’ve collected these animal toilet paper roll crafts into one easy list you can save, pin, and come back to anytime.
Below, you’ll find a mix of farm animals, forest friends, ocean creatures, and a few magical favorites — all made with the same simple base. Whether you’re crafting with toddlers, preschoolers, or early elementary kids, these animal toilet paper roll crafts are flexible enough to work for different ages and skill levels.
Toilet Paper Roll Frog Craft
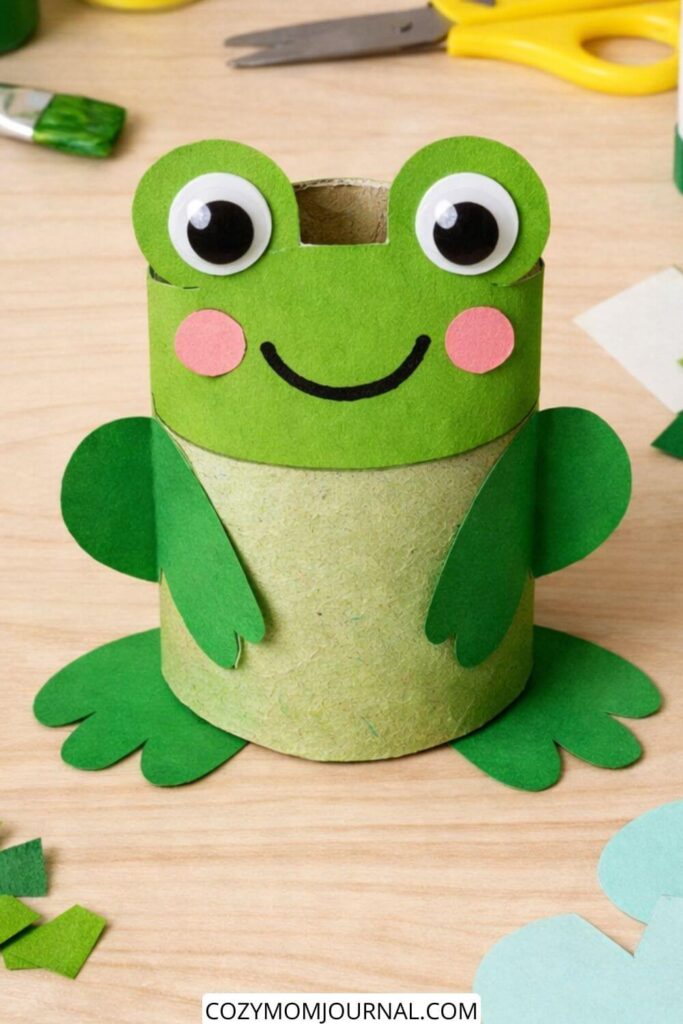
This frog craft is simple, uses basic materials, and is perfect for kids. No complicated cutting or painting is needed.
Materials You Need
- 1 empty toilet paper roll
- Green paint (light or medium green)
- Paintbrush
- Green paper or scrap paper (for arms, feet, and head details)
- White paper or googly eyes
- Black marker
- Pink paper or marker (for cheeks, optional)
- Glue (school glue works fine)
- Child-safe scissors
How to Make the Frog
Step 1: Paint the Roll
Paint the outside of the toilet paper roll green.
Let it dry completely before moving on.
Step 2: Make the Frog Face
Cut a green paper strip slightly wider than the roll’s opening.
Round the top corners to create the frog’s head shape.
Glue it inside the top of the roll so it sticks up slightly.
Step 3: Add the Eyes
Glue two googly eyes or paper circles to the frog’s head.
Draw black pupils if you are using paper eyes.
Step 4: Draw the Face
Use a black marker to draw a simple smile.
Add pink cheeks with paper circles or a marker if you like.
Step 5: Make the Arms and Feet
Cut simple oval or rounded shapes from green paper.
Glue two small shapes on the sides for arms.
Glue two larger shapes at the bottom for feet.
Step 6: Let It Dry
Set the frog aside and allow all the glue to dry completely.
Tips for Kids
- Keep shapes simple, no details are needed
- Pre-cut pieces for younger children
- Let kids choose different shades of green
- This craft works great for spring, animal, or recycling themes
This frog craft is sturdy, cute, and easy to recreate with classroom or home supplies.
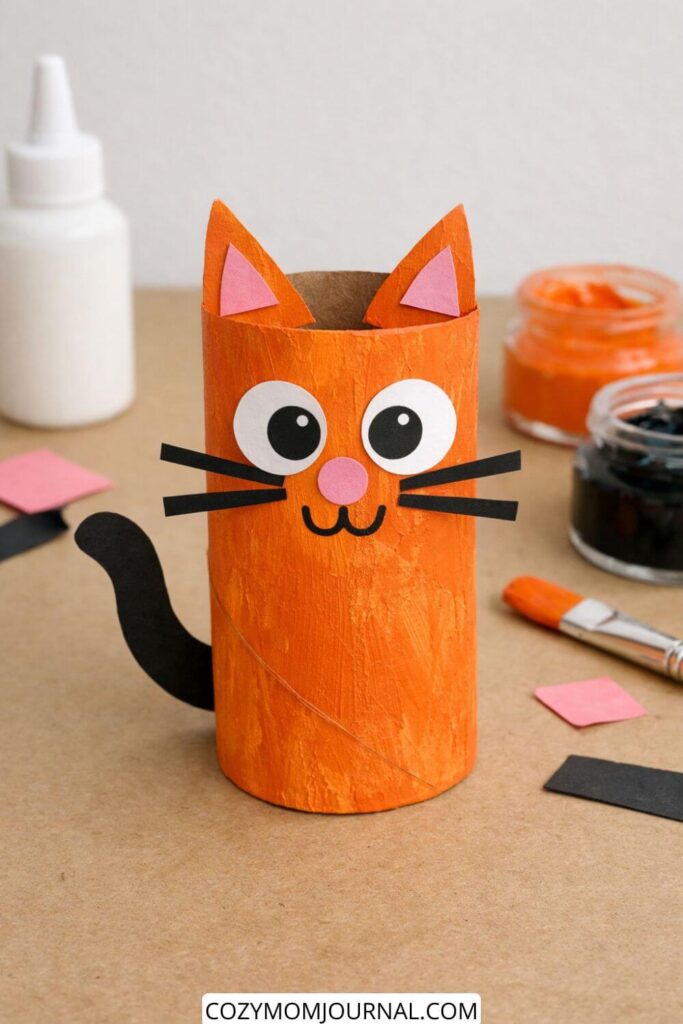
Paper Roll Cat
Materials you need
- 1 empty toilet paper roll
- Acrylic paint (any cat color: orange, gray, brown, white, etc.)
- Paintbrush
- Scrap paper or colored paper (for ears, nose, whiskers, tail)
- Black marker or pen
- Glue (school glue or craft glue)
- Scissors
How to make the toilet paper roll cat
Step 1: Paint the roll
Paint the entire toilet paper roll with your chosen color. Let it dry completely. One coat is usually enough for a simple kids’ craft.
Step 2: Make the ears
Cut two small triangles from scrap paper for the ears.
Cut two smaller triangles in a lighter color and glue them on top for the inner ears.
Step 3: Attach the ears
Gently press the top of the roll slightly inward to create a soft fold.
Glue the ears to the inside edge of the roll so they stick up.
Step 4: Create the face
- Cut two circles for the eyes and draw pupils with a marker
- Cut a small circle or oval for the nose
- Cut thin strips for whiskers
Glue everything onto the front of the roll.
Use a marker to draw a simple mouth.
Step 5: Add the tail
Cut a long strip of paper for the tail.
Curl it slightly with your fingers and glue it to the back or side of the roll.
Step 6: Final details
Let everything dry, then add extra details with a marker if you like, such as stripes or spots.
Tip for kids
Keep shapes big and simple, and let kids choose their own colors. This craft works well even without perfect cutting or painting, which makes it ideal for group activities or classroom crafts.
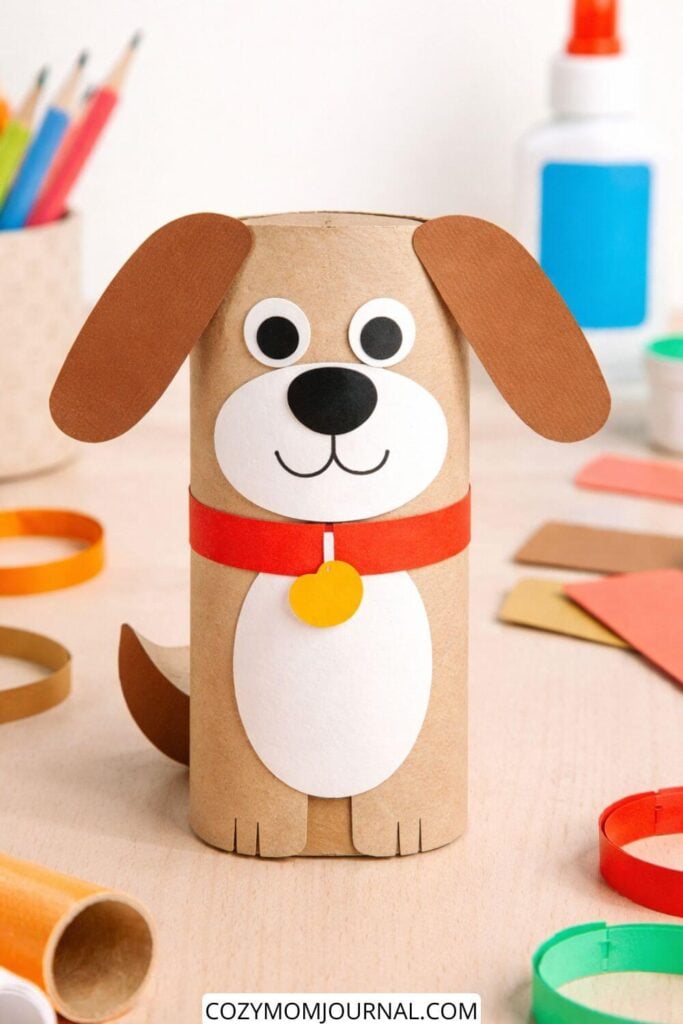
Toilet Paper Roll Dog
Materials You’ll Need
- 1 empty toilet paper roll
- Brown paint (or leave the roll natural, as shown)
- Paintbrush (optional if painting)
- Brown paper scraps (ears and tail)
- White paper scraps (muzzle and belly)
- Black paper or black marker (nose, mouth, pupils)
- Red paper strip (collar)
- Small yellow paper circle (tag, optional)
- Glue
- Scissors
How to Make the Dog (Step by Step)
Step 1: Prepare the base
Use the toilet paper roll as the body. You can leave it unpainted for a natural look or paint it light brown and let it dry.
Step 2: Make the ears
Cut two long oval shapes from brown paper. Glue them to the top sides of the roll so they hang down slightly.
Step 3: Create the face
Cut an oval shape from white paper for the muzzle and glue it to the front.
Add two small white circles for the eyes, then smaller black circles or dots for pupils.
Cut or draw a black oval nose and draw a simple smile with a marker.
Step 4: Add the belly
Cut a larger white oval and glue it to the lower front of the roll.
Step 5: Make the tail
Cut a curved tail shape from brown paper and glue it to the back side of the roll.
Step 6: Add the collar
Wrap a red paper strip around the roll and glue it in place.
Glue a small yellow circle to the front as a tag if desired.
Step 7: Optional feet detail
Cut small slits at the bottom of the roll and draw simple lines to suggest paws.
Tips for Kids’ Crafting
- Pre-cut shapes for younger children
- Use glue sticks or washable glue
- Keep details simple for a clean, easy-to-follow project
This dog craft is quick, sturdy, and perfect while still being fun and easy for kids to make.
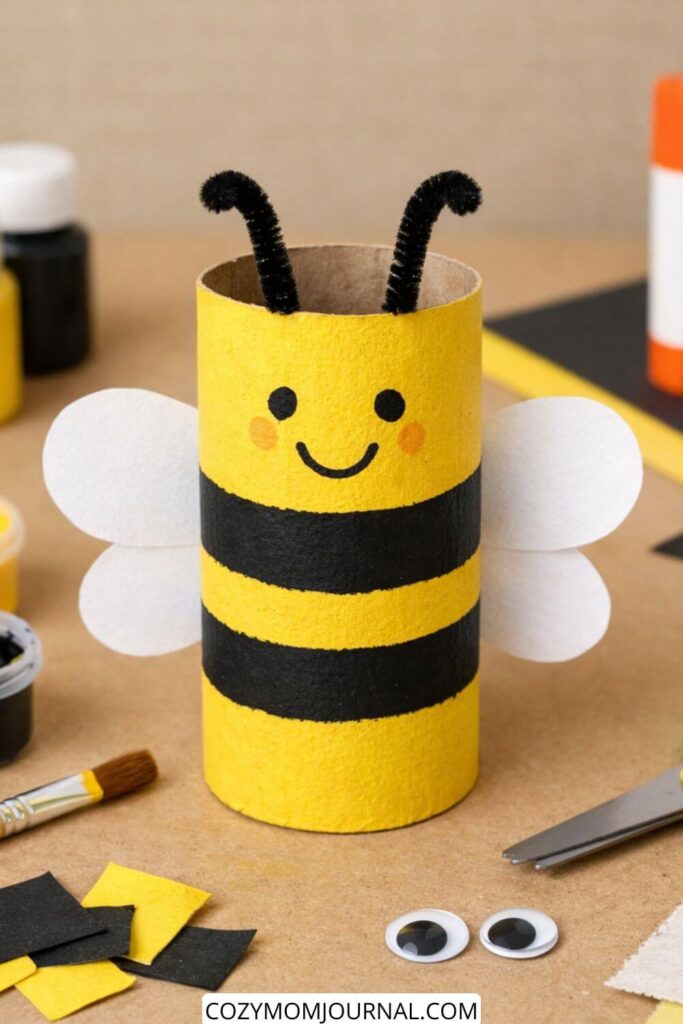
Bee Toilet Paper Craft
Materials You Need
- Empty toilet paper roll
- Yellow acrylic or tempera paint
- Black acrylic or tempera paint
- White paper or cardstock (for wings)
- Black pipe cleaner (for antennae)
- Glue (school glue or craft glue)
- Scissors
- Paintbrush
- Black marker or small brush (for the face)
How to Make the Bee (Step by Step)
Step 1: Paint the base
Paint the entire toilet paper roll yellow. Let it dry completely. If needed, add a second coat.
Step 2: Add the stripes
Paint 2–3 horizontal black stripes around the roll. Let it dry.
Step 3: Make the wings
Cut four small oval shapes from white paper. Glue two on each side of the roll.
Step 4: Create the antennae
Cut one pipe cleaner in half. Slightly curl the ends and glue them inside the top of the roll so they stick up.
Step 5: Draw the face
Use a black marker or small brush to draw simple eyes and a smile on the front. You can add small yellow or pink dots for cheeks if you like.
Step 6: Final check
Let everything dry fully. Make sure all pieces are secure before kids start playing with it.
This bee craft is simple, sturdy, and perfect for kids. It uses basic materials, has no complicated steps.
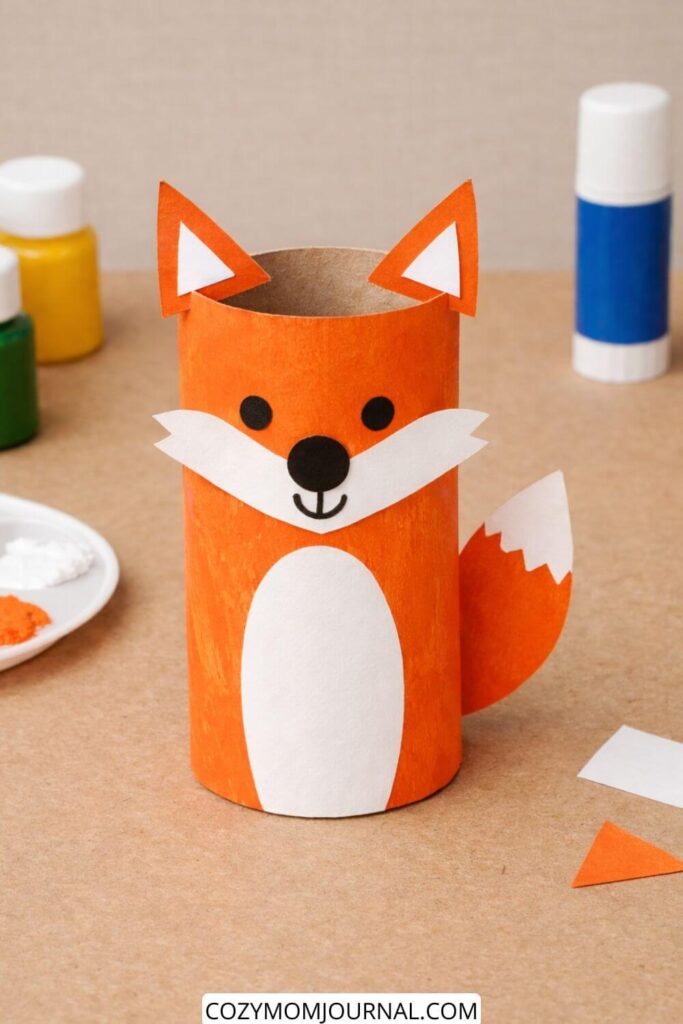
Paper Roll Fox
Materials You Need
- Empty toilet paper roll
- Orange acrylic or tempera paint
- White paint or white paper
- Black marker or black paper
- Scrap paper or cardstock (orange, white, black)
- Child-safe scissors
- Glue (school glue or glue stick)
- Paintbrush
- Paper towel or scrap paper to protect the table
How to Make the Fox
Step 1: Paint the roll
Paint the entire toilet paper roll orange. Let it dry completely. A second coat helps if the cardboard shows through.
Step 2: Make the ears
Cut two small triangles from orange paper and two smaller triangles from white paper. Glue the white triangles onto the orange ones. Attach the ears to the inside top edge of the roll so they stick out.
Step 3: Create the face
Cut two small black circles for the eyes and one larger black circle or oval for the nose. Glue them onto the front of the roll. Use a black marker to draw a simple smile under the nose.
Step 4: Add the fox cheeks
Cut a curved white shape for the fox’s cheeks/muzzle. Glue it below the eyes and around the nose.
Step 5: Make the belly
Cut an oval shape from white paper and glue it to the lower front of the roll.
Step 6: Create the tail
Cut a simple tail shape from orange paper and a small white zigzag or triangle for the tip. Glue the white piece onto the tail, then attach the tail to the back or side of the roll.
Step 7: Let everything dry
Allow the glue to dry fully before playing or displaying the fox.
This craft uses only basic shapes, minimal cutting, and simple steps, making it easy for kids to complete with little help.
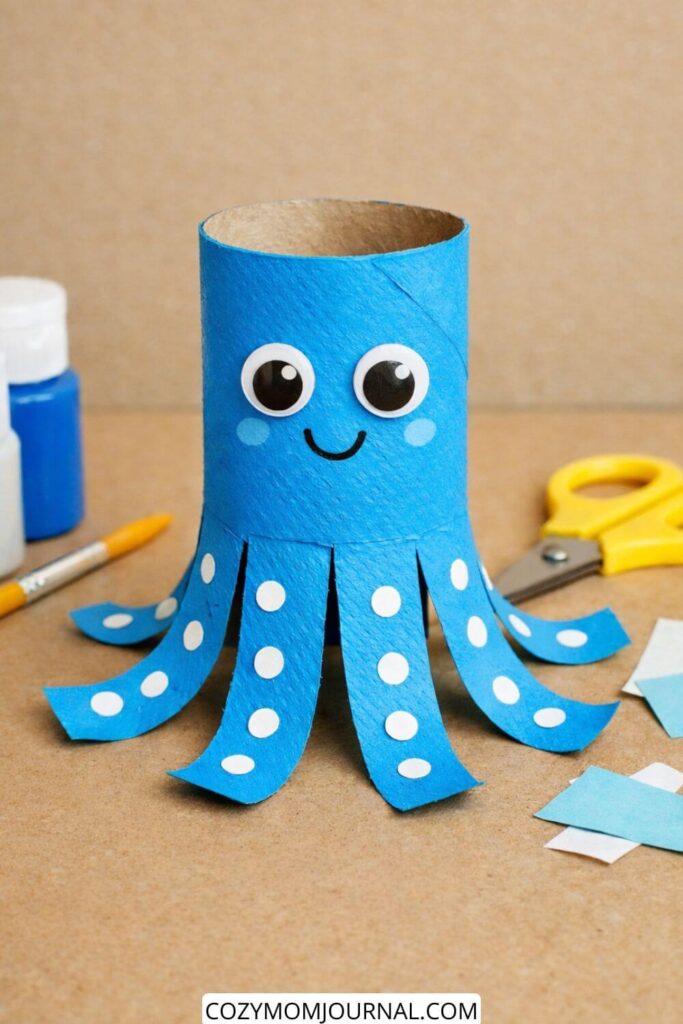
Octopus Toilet Paper Roll Craft
Materials you need
- Empty toilet paper roll
- Acrylic paint (blue or any color you like)
- Paintbrush
- White paper or cardstock (for dots and eyes)
- Black marker or pen
- Child-safe scissors
- Glue
- Optional: googly eyes
How to make the octopus
Step 1: Paint the roll
Paint the entire toilet paper roll with acrylic paint. Let it dry completely. You may need two thin coats for even coverage.
Step 2: Create the tentacles
From the bottom of the roll, cut straight vertical strips upward, stopping about 2–3 cm before the top. Cut 8 strips to form the tentacles.
Step 3: Shape the tentacles
Gently bend each strip outward and slightly curl the ends using your fingers.
Step 4: Add the details
Cut small white circles from paper and glue them onto the tentacles as suction cups.
Draw a simple smile with a black marker.
Step 5: Make the eyes
Glue on googly eyes, or cut white circles from paper and draw black dots for pupils, then glue them on.
Step 6: Final touches
Let everything dry. Adjust the tentacles so the octopus can stand nicely on the table.
This craft is simple, quick to make, and perfect for kids since it uses basic materials and easy steps.
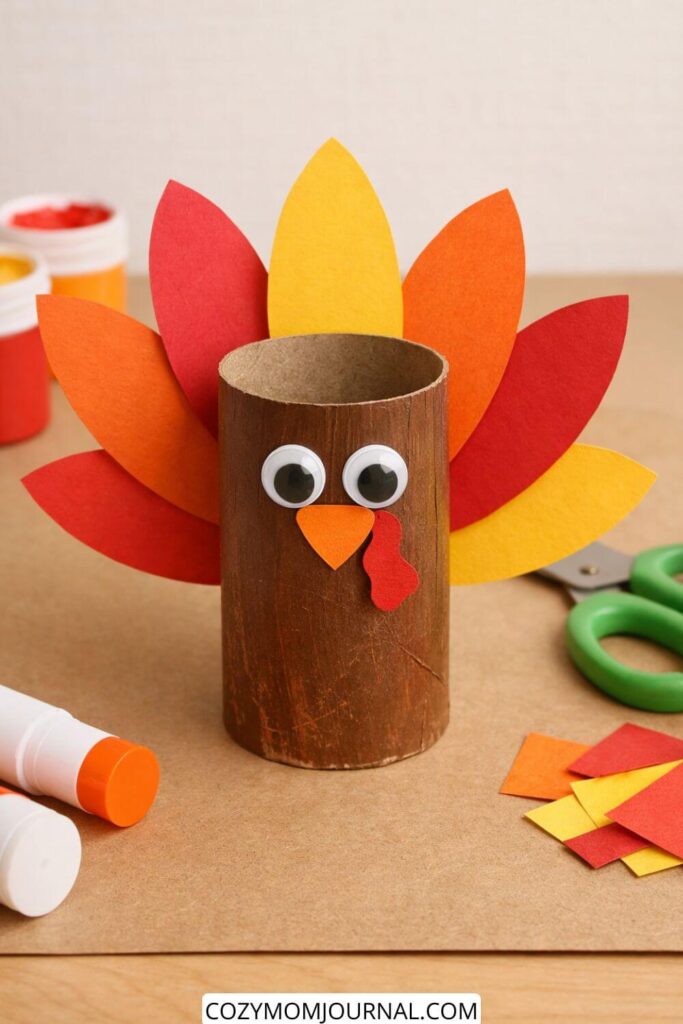
Toilet Paper Roll Turkey
Materials You’ll Need
- Empty toilet paper roll
- Brown acrylic or tempera paint
- Paintbrush
- Colored paper scraps (red, orange, yellow)
- Googly eyes (or draw eyes with a marker)
- Glue (school glue or glue stick)
- Scissors
- Craft paper or cardboard for the table surface (optional, keeps things clean)
How to Make the Turkey
Step 1: Paint the roll
Paint the entire toilet paper roll brown. Let it dry completely. This will be the turkey’s body.
Step 2: Cut the feathers
From the colored paper scraps, cut simple oval or teardrop shapes. You’ll need about 5–7 feathers in fall colors like red, orange, and yellow.
Step 3: Attach the feathers
Glue the paper feathers to the back inside edge of the roll so they fan out behind it. Press gently and let the glue set.
Step 4: Make the face
Glue two googly eyes near the top front of the roll.
Cut a small orange triangle for the beak and glue it just below the eyes.
Cut a small red teardrop shape for the wattle and glue it next to the beak.
Step 6: Final touch
Let everything dry fully before handling. The turkey should stand upright on its own.
This craft is simple, uses basic shapes, and is easy for kids to make with minimal help. The minimal supplies and clean design make it perfect for a classroom or at-home craft table.
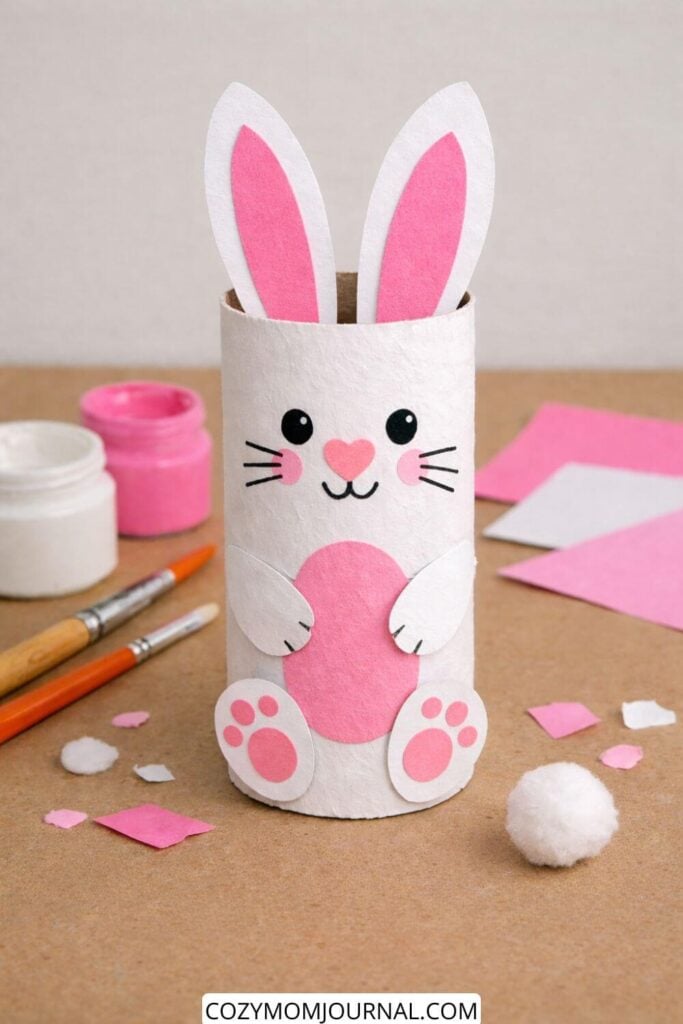
Paper Roll Bunny
Materials You’ll Need
- Empty toilet paper roll
- White acrylic paint
- Pink acrylic paint (or pink paper)
- White paper or cardstock
- Pink paper or foam sheet
- Black marker
- Small paintbrush
- Glue
- Scissors
How to Make the Bunny
Step 1: Paint the base
Paint the toilet paper roll white. Let it dry completely. A second coat helps make it look clean and bright.
Step 2: Make the ears
Cut two long bunny ears from white paper. Cut two smaller ear shapes from pink paper and glue them onto the white ears. Glue the ears inside the top of the roll so they stick up.
Step 3: Create the face
Use a black marker to draw two eyes, a small mouth, and whiskers. Add a pink heart or oval shape for the nose.
Step 4: Add the belly and arms
Cut an oval shape from pink paper for the bunny’s belly and glue it to the front. Cut two small white oval shapes for arms and glue them on the sides of the belly.
Step 5: Make the feet
Cut two white oval shapes for feet and add smaller pink ovals for paw details. Glue them to the bottom front of the roll.
Step 6: Final touches
Let everything dry fully. Check that all pieces are secure, and your bunny is ready to display.
Tip for Kids
You can skip painting and use white paper to wrap the roll instead. This makes the craft even faster and less messy for younger children.
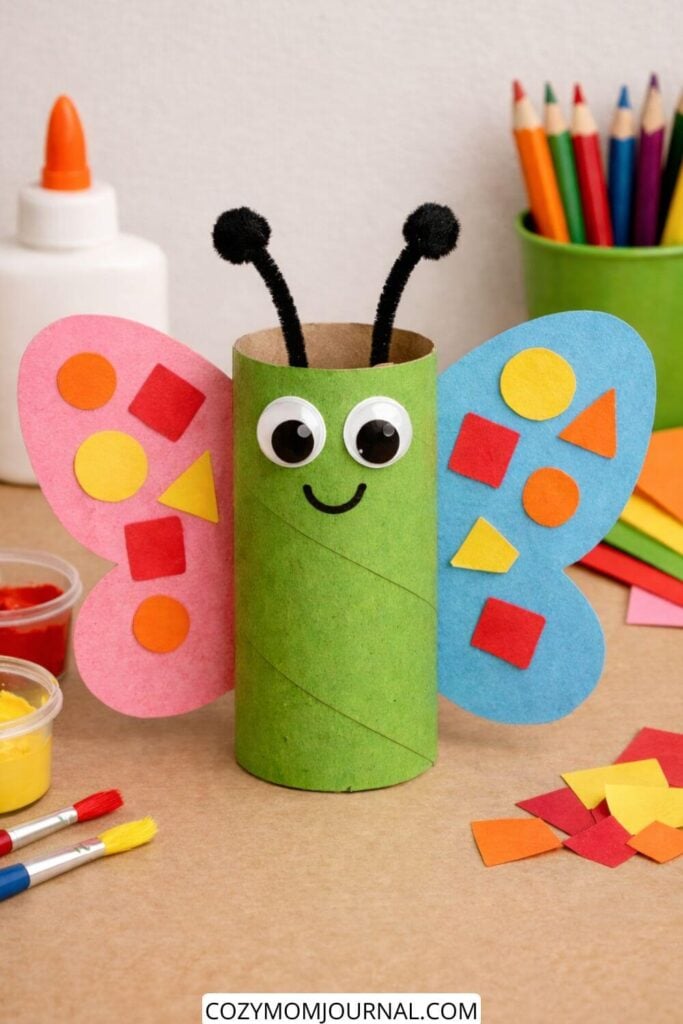
Butterfly Toilet Roll Craft
Materials You Need
- Empty toilet paper roll
- Acrylic paint (green for the body, any colors for details)
- Colored paper or craft foam (for wings and decorations)
- Googly eyes
- Black pipe cleaners (for antennae)
- Glue (school glue or craft glue)
- Black marker
- Scissors
How To Make The Butterfly
Step 1: Paint the body
Paint the toilet paper roll green (or any color you like). Let it dry completely.
Step 2: Prepare the wings
Cut two large wing shapes from colored paper. You can fold the paper in half before cutting so both wings are the same shape.
Step 3: Decorate the wings
Cut simple shapes (circles, squares, triangles) from scrap paper and glue them onto the wings. Keep the shapes big and simple for kids.
Step 4: Attach the wings
Glue one wing to each side of the toilet paper roll. Press gently and let them dry.
Step 5: Make the face
Glue the googly eyes onto the front of the roll. Draw a simple smile with a black marker.
Step 6: Add antennae
Bend two pipe cleaners slightly and glue them inside the top of the roll so they stick out.
Step 7: Final check
Let everything dry well before playing or displaying the butterfly.
This craft is easy, uses basic materials, and works well for kids because there are no small or complicated steps.
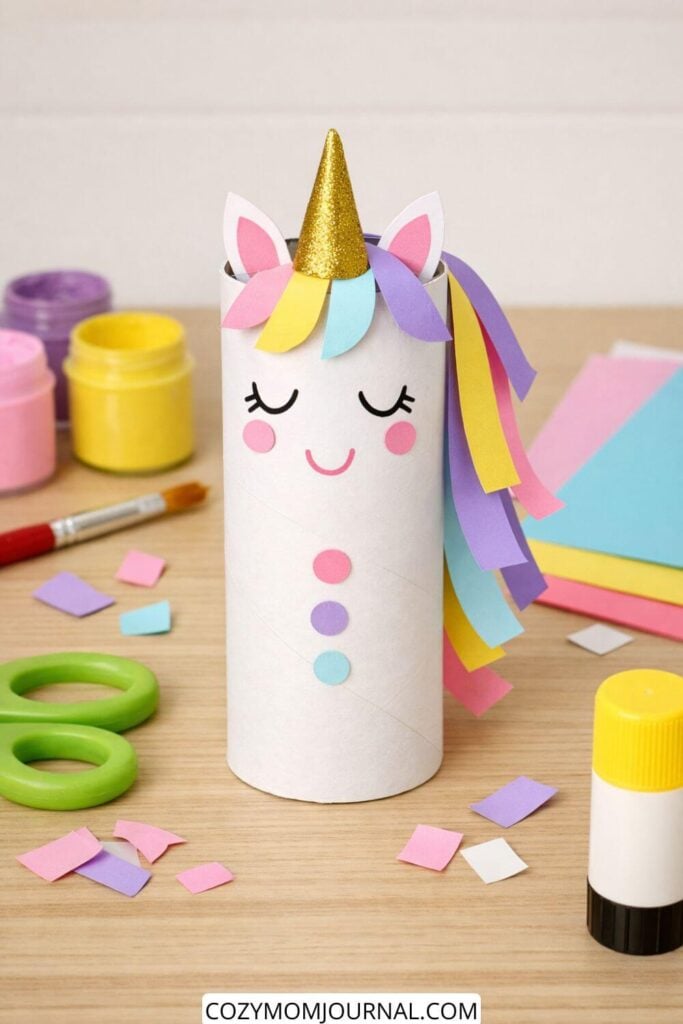
Toilet Paper Roll Unicorn Craft
Materials You Need
- Empty toilet paper roll
- White paint or white paper
- Colored paper scraps (pink, yellow, purple, blue)
- Gold paper or gold cardstock (for the horn)
- A small piece of scrap paper or a cotton ball
- Glue stick or liquid glue
- Black marker
- Scissors
How to Make the Unicorn
Step 1: Prepare the base
Cover the toilet paper roll with white paint or wrap it with white paper. Let it dry completely.
Step 2: Add inner support
Lightly push a small piece of paper or a cotton ball inside the top of the toilet paper roll. This creates a soft base that makes it much easier to attach the ears, fringe, and horn securely.
Step 3: Make the face
Use a black marker to draw closed eyes and a small smile on the front. Cut small pink circles from paper and glue them on as cheeks.
Step 4: Create the fringe (front mane)
Cut short strips from colorful paper scraps to form the fringe. Glue these pieces to the front top of the roll first, before adding the horn. This order makes the unicorn look neater and keeps the layers simple.
Step 5: Add the ears
Cut two ear shapes from white paper and two smaller pink shapes. Glue the pink pieces onto the white ears, then attach them to the top sides, pressing them gently into the inner paper or cotton support.
Step 6: Make the horn
Cut a small triangle from gold paper, roll it into a cone, and glue it closed. Attach the horn on top of the fringe, pressing it into the inner support so it stays upright.
Step 7: Create the mane
Cut longer strips from colorful paper scraps and glue them along the back or one side of the roll so they hang down like a rainbow mane.
Step 8: Finish the details
Add small colored paper circles or simple shapes to the front for decoration if desired.
Tip
This craft works well without paint, using only paper and glue. The inner paper or cotton support helps keep everything in place and makes the unicorn easier for small hands to assemble.
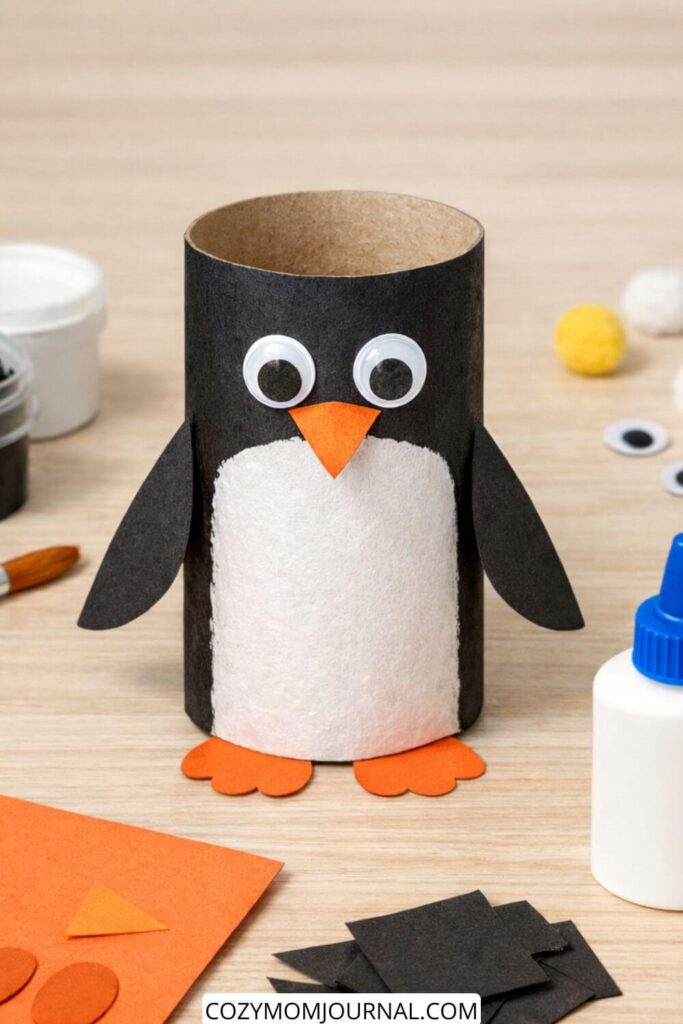
Toilet Paper Roll Penguin
Materials you need
- Empty toilet paper roll
- Black paint (or black paper)
- White paint (or white paper)
- Orange paper (for beak and feet)
- Black paper (for wings)
- Googly eyes
- Glue
- Paintbrush
- Scissors
How to make the penguin
Step 1: Paint the base
Paint the outside of the toilet paper roll black and let it dry. Paint a white oval on the front for the penguin’s belly. Let it dry completely.
Step 2: Prepare the paper pieces
Cut two simple wing shapes from black paper.
Cut a small triangle from orange paper for the beak.
Cut two oval or rounded shapes from orange paper for the feet.
Step 3: Glue the face
Glue the googly eyes near the top of the roll.
Glue the orange triangle under the eyes as the beak.
Step 4: Attach the wings
Glue one black paper wing to each side of the roll.
Step 5: Add the feet
Glue the orange feet to the bottom front of the roll so they peek out.
Step 6: Let it dry
Leave the penguin to dry fully before playing or displaying it.
This craft is easy to customize with different eye sizes or painted details, and it works well for kids because all shapes are simple and forgiving.
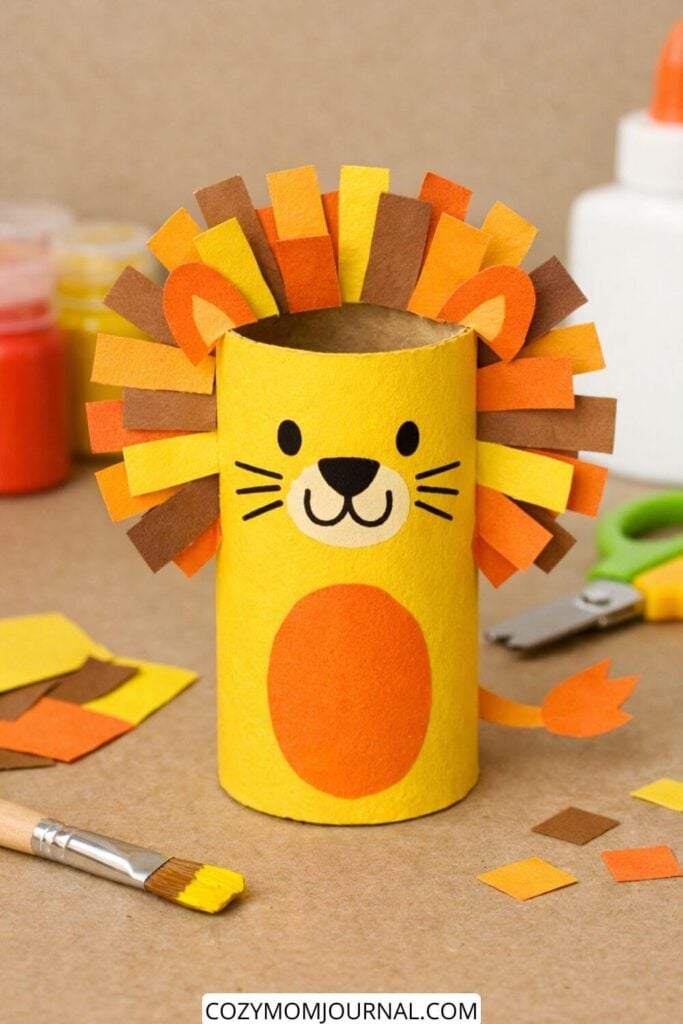
Lion Toilet Paper Roll Craft
Materials You Will Need
- Empty toilet paper roll
- Yellow paint (washable tempera or acrylic)
- Brown, orange, and yellow colored paper or cardstock (for the mane and details)
- White paper (small piece for the snout)
- Black marker or black paint
- Glue (school glue works well)
- Scissors
- Paintbrush
How to Make the Lion
Step 1: Paint the base
Paint the entire toilet paper roll yellow. Let it dry completely. This will be the lion’s body.
Step 2: Create the mane
Cut simple rectangular strips from brown, orange, and yellow paper. These do not need to be perfect. Glue the strips around the top edge of the roll, slightly overlapping, to form the lion’s mane.
Step 3: Add the ears
Cut two small semicircles from yellow paper and two smaller ones from orange paper. Glue the smaller shapes onto the larger ones, then attach them to the mane on each side.
Step 4: Make the face
Cut a small oval from white paper and glue it to the front for the snout. Draw the eyes, nose, mouth, and whiskers with a black marker, or paint them on.
Step 5: Add body details
Cut a simple oval from orange paper and glue it to the front as the belly.
Step 6: Optional tail
Cut a thin strip of yellow paper and a small leaf shape from orange paper. Glue the leaf shape to one end, then attach the tail to the back of the roll.
Step 7: Final touches
Let everything dry, then your lion is ready to play or display.
This craft uses only basic shapes, dries quickly, and is easy for kids to make with minimal help.
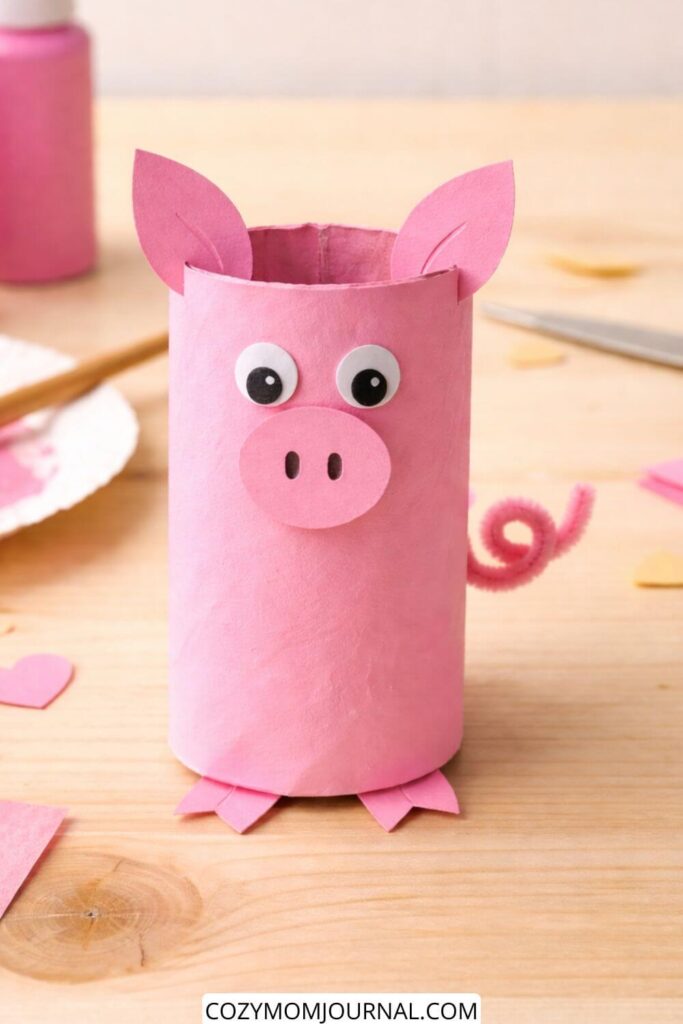
Pig Toilet Paper Roll Craft
Materials You Need
- Empty toilet paper roll
- Pink acrylic paint
- Paintbrush
- Pink paper scraps (or construction paper)
- Googly eyes (or draw eyes with a marker)
- Pink pipe cleaner (for the tail)
- Glue (liquid glue or glue stick)
- Black marker
- Optional: white paper for eye background
How to Make the Pig
Step 1: Paint the base
Paint the entire toilet paper roll pink. Let it dry completely. One coat is usually enough, but you can add a second if needed.
Step 2: Make the ears
Cut two simple ear shapes from pink paper. Slightly fold the bottom of each ear so they are easier to glue and stand out a bit.
Step 3: Attach the ears
Glue the ears to the inside top edge of the roll so they stick out naturally. Hold for a few seconds until they stay in place.
Step 4: Create the snout
Cut a small oval or circle from pink paper. Draw two black nostrils with a marker, then glue the snout to the front of the roll.
Step 5: Add the eyes
Glue on googly eyes above the snout. If you don’t have googly eyes, cut small white circles and draw black dots in the middle.
Step 6: Make the tail
Twist a pink pipe cleaner into a loose spiral. Glue it to the back of the roll.
Step 7: Optional feet
Cut small triangle or rectangle shapes from pink paper and glue them to the bottom edge to look like little feet.
Step 8: Final check
Let everything dry well before playing with it.
This craft is easy, fast, and perfect for kids because all the shapes are simple and forgiving. It also works great as a farm animal activity or recycled craft project.
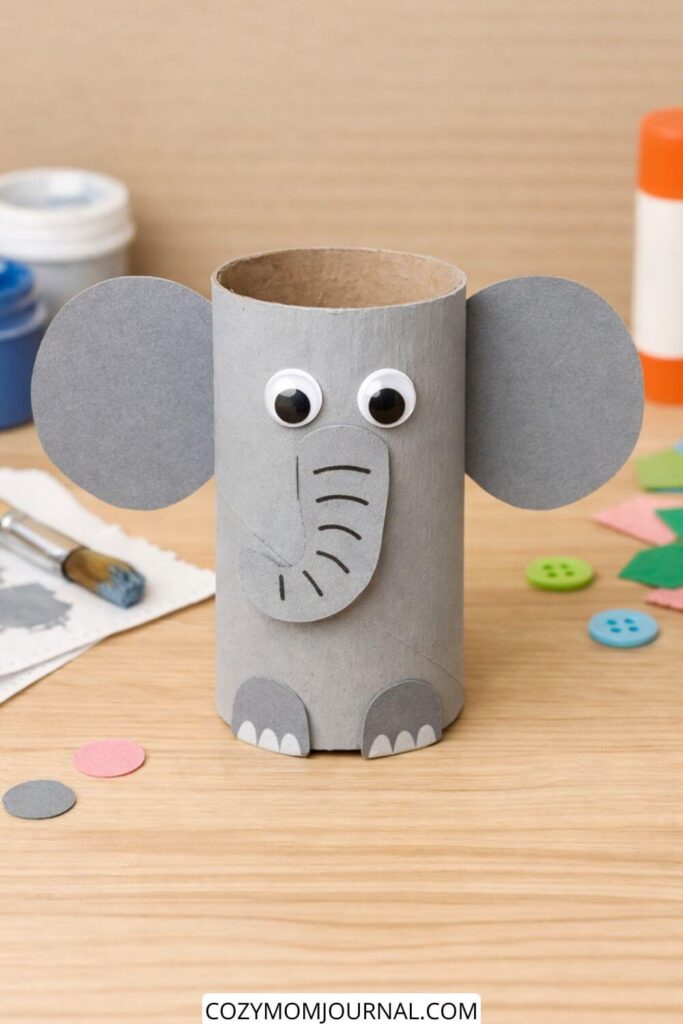
Paper Roll Elephant
Materials You Need
- 1 empty toilet paper roll
- Gray acrylic or poster paint
- Paintbrush
- Gray paper or cardstock (for ears, trunk, and feet)
- Googly eyes (or draw eyes with a marker)
- Black marker
- Glue (school glue or craft glue)
- Scissors
How to Make the Elephant
Step 1: Paint the toilet paper roll
Paint the entire toilet paper roll gray. Let it dry completely. This will be the elephant’s body.
Step 2: Cut the elephant parts from paper
- Cut two large circles or oval shapes for the ears.
- Cut one long, rounded strip for the trunk.
- Cut two small rounded shapes for the feet.
Step 3: Attach the ears
Glue one ear on each side of the toilet paper roll. Make sure they sit at the same height so the face looks balanced.
Step 4: Add the trunk
Glue the trunk to the front of the roll, starting just below where the eyes will go. Let it curve slightly for a cute look.
Step 5: Glue on the eyes
Glue the googly eyes above the trunk. If you don’t have googly eyes, draw simple round eyes with a black marker.
Step 6: Draw the details
Use a black marker to draw short curved lines on the trunk and small details on the feet.
Step 7: Attach the feet
Glue the feet at the bottom front of the roll so they peek out slightly.
Step 8: Let everything dry
Set the elephant aside for a few minutes until all glued parts are secure.
Tip for Kids
If working with younger children, you can pre-cut the paper shapes. Kids can focus on painting, gluing, and decorating.
This elephant craft is perfect for quick classroom activities, rainy afternoons, or animal-themed projects.
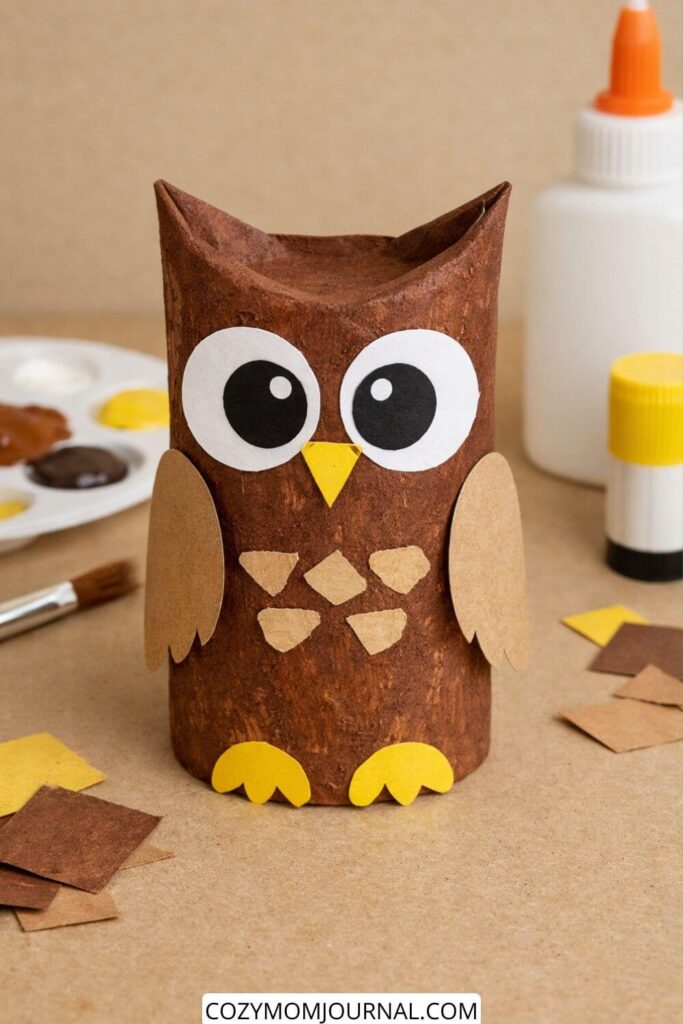
Owl Paper Roll Craft
Materials you need
- Empty toilet paper roll
- Brown paint (acrylic or washable kids’ paint)
- White and black paper (for the eyes)
- Yellow paper (for the beak and feet)
- Light brown or beige paper scraps (for wings and chest details)
- Glue (school glue or craft glue)
- Paintbrush
- Scissors (for adult supervision if needed)
How to make the owl
Step 1: Paint the roll
Paint the entire toilet paper roll brown. Let it dry completely.
Step 2: Shape the owl ears
Gently press the top of the roll inward from both sides to form two small pointed “ears.” This step is easy and safe for kids.
Step 3: Make the eyes
Cut two large white circles and two smaller black circles. Glue the black circles onto the white ones, then glue the eyes onto the front of the roll.
Step 4: Add the beak
Cut a small yellow triangle and glue it between the eyes.
Step 5: Create the wings
Cut two simple oval or teardrop shapes from light brown or beige paper. Glue one wing to each side of the roll.
Step 6: Decorate the chest
Cut small rounded or diamond-shaped pieces from paper scraps and glue them onto the front to create a feather pattern.
Step 7: Make the feet
Cut two small yellow foot shapes and glue them to the bottom front of the roll.
Step 8: Let it dry
Allow everything to dry well before playing or displaying the owl.
This owl craft is simple, uses basic shapes, and is perfect for young children. It works well as a classroom craft, rainy-day activity, or recycled art project.
Final Thoughts: Why I’ll Never Get Tired of Animal Toilet Paper Roll Crafts
Every time we make animal toilet paper roll crafts, I’m reminded that creativity doesn’t need to be expensive, complicated, or Pinterest-perfect. Some of our favorite creations came from uneven eyes, crooked ears, and colors that definitely weren’t “realistic” — and honestly, those are the ones we still laugh about.
What I love most is how animal toilet paper roll crafts invite kids to slow down, use their hands, and let their imagination lead. One minute it’s “just a frog,” the next it’s a character in a whole made-up world. And if you’re anything like me, you’ll secretly enjoy making one alongside them “just to help.”
If you’re in the mood for even more creative inspiration, you might also enjoy:
- my easy animal mason jar crafts for kids, which are perfect when you want something decorative and gift-worthy,
- these simple doodle drawing ideas for quiet afternoons or creative breaks,
- or my collection of DIY Halloween crafts if you love seasonal projects as much as I do.
You can find all of those linked on my site, and I share new ideas regularly over on my Pinterest, where I save my favorite animal toilet paper roll crafts, kids’ activities, and cozy DIY inspiration. I’d love for you to join me there and pin the projects you want to try next.
Before you go, I’m curious:
- Which animal toilet paper roll craft was your favorite?
- Have you already made one of these with your kids?
- Or do you have a go-to recycled craft that always works in your home?
If you make any of these animal toilet paper roll crafts, I’d absolutely love to see them. Save your favorite ideas, share your creations on Pinterest, and don’t forget — creativity doesn’t have to be perfect to be meaningful.