Paper frog crafts have a special place in my heart, because they’re one of those simple activities that magically slow everything down. Whenever we pull out green paper, scissors, and glue, the noise softens, little hands get busy, and suddenly we’re all focused on creating something silly and adorable together. I know you’ve probably been there too — looking for a kids’ craft that’s easy, affordable, and doesn’t turn your entire living room into a glitter disaster.
That’s exactly why I love paper frog crafts. They’re playful, forgiving, and perfect for kids of different ages. You don’t need fancy supplies or advanced crafting skills. Just paper, a bit of patience, and the willingness to embrace slightly crooked smiles and uneven legs (which, honestly, makes the frogs even cuter).
I’ve also been in that moment when you think: “I need an activity that actually works.” Something that keeps kids engaged without constant help, works in a small space, and doesn’t require a trip to the craft store. These paper frog crafts solve that problem beautifully. They’re quick to prep, easy to follow, and flexible enough for kids to add their own creative twists.
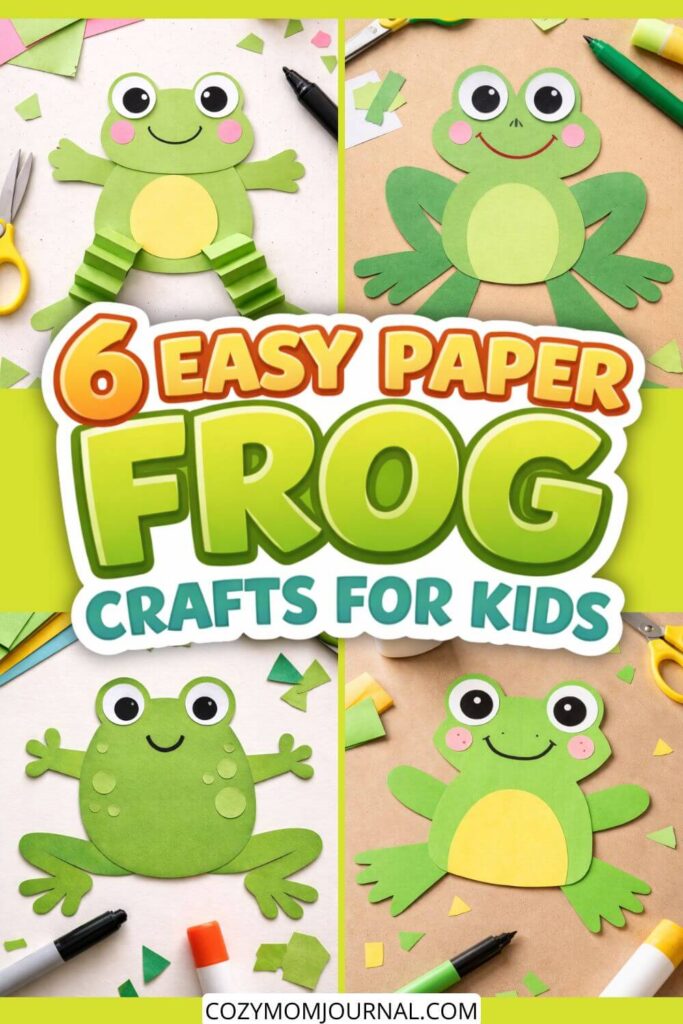
Below, you’ll find six paper frog crafts that I’ve made again and again — sometimes on rainy afternoons, sometimes as a last-minute weekend activity, and sometimes just because we needed a creative reset.
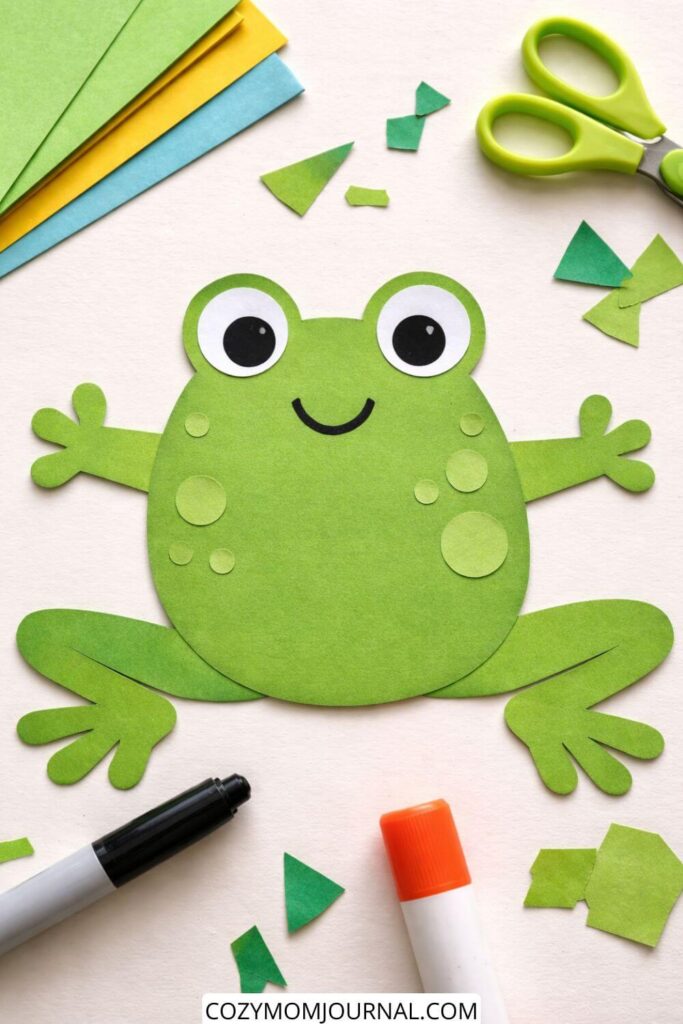
1. Chubby Flat Frog
Materials
- Green construction paper or colored paper
- White paper (for the eyes)
- Black marker pen
- Scissors
- Glue stick
- Small paper scraps (green and white work best)
How to Make the Paper Frog
- Cut one large oval or rounded circle from green paper for the frog’s body.
- Cut two long, flat shapes for the arms and two wider shapes for the legs. Keep the shapes simple and rounded.
- Cut two small circles from white paper and two smaller black circles for the eyes.
- Glue the arms and legs onto the back of the body so they stick out to the sides and bottom.
- Glue the eyes to the top of the body, slightly overlapping the edge to give a cute frog look.
- Use a black marker to draw a simple smile and small details like nostrils or dots.
- From green paper scraps, cut small circles and glue them onto the body as spots.
Let the glue dry completely. The frog is flat, easy to make, and perfect for crafting with kids.
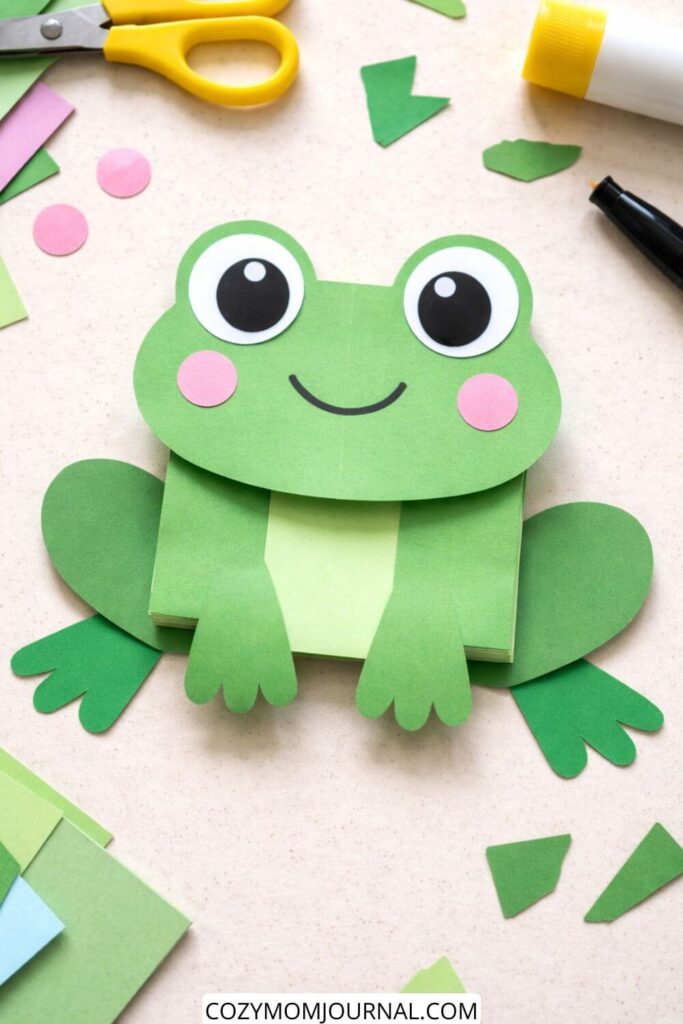
2. Cute 3D Frog Craft
Materials you need
- Green colored paper (2–3 shades if possible)
- White paper (for the eyes)
- Small scraps of pink paper (for the cheeks)
- Black marker pen
- Scissors
- Glue stick
- Pencil (optional)
How to make the paper frog
- Make the head
Cut a large rounded frog head from green paper.
Shape the top with two gentle bumps where the eyes will sit. - Create the eyes
Cut two white circles.
Draw black pupils with a marker.
Glue the eyes onto the top of the head so they slightly stand out. - Add the face
Cut two small pink circles for the cheeks and glue them on.
Draw a simple curved smile with a black marker. - Make the raised body
Cut 2–3 same-size green rectangles.
Glue them on top of each other to create a thicker, slightly raised body.
Optionally, glue a lighter green strip on the top layer for the belly. - Add the arms
Cut two simple flat arm shapes.
Glue them under the raised body so they peek out on the sides. - Add the legs
Cut two larger flat leg shapes.
Glue them behind the body so they stay flat on the table. - Assemble the frog
Glue the head on top of the raised body.
Press gently and let everything dry.
This paper frog uses only basic shapes and simple layering, making it easy to create and perfect for crafting with kids.
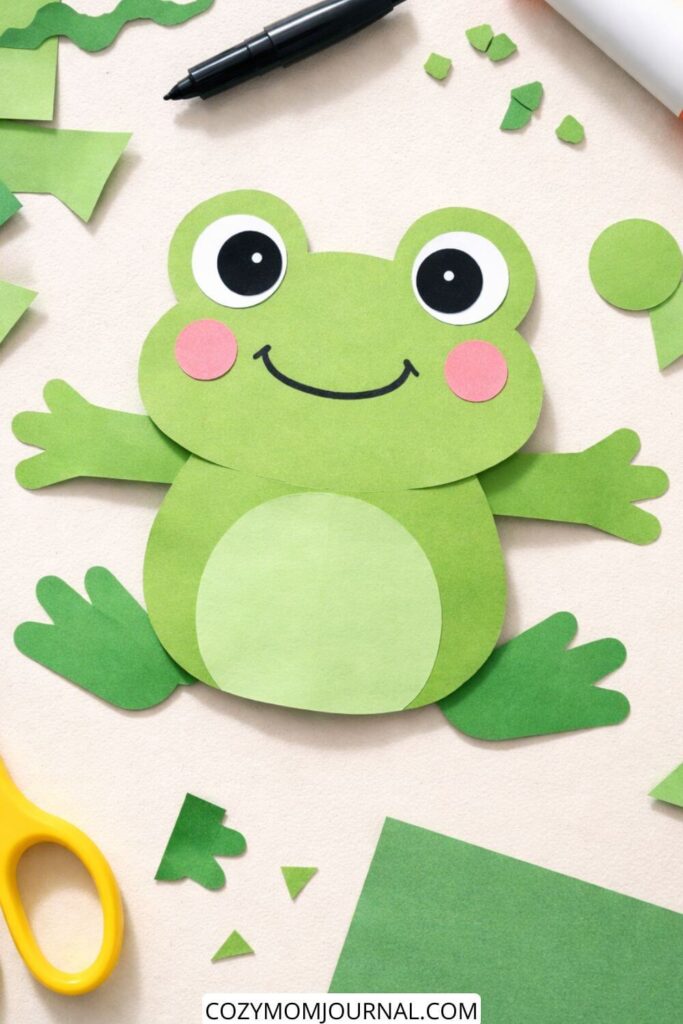
3. Easy & Cute Frog Craft
Materials you need
- Green colored paper (2 shades if possible)
- Small piece of white paper (for the eyes)
- Small piece of black paper or a black marker
- Pink paper scraps (optional, for cheeks)
- Scissors
- Glue stick
- Black marker pen
How to make the paper frog
- Make the body
Cut one large oval or circle from green paper. This will be the frog’s body. - Add the belly
Cut a smaller oval from a lighter green paper and glue it to the center of the body. - Create the eyes
Cut two medium circles from green paper for the eye bases.
Cut two smaller white circles and glue them on top.
Add black dots with a marker or glue on small black paper circles. - Make the arms and legs
Cut simple flat arm and leg shapes from green paper.
No details are needed, just rounded ends.
Glue them to the sides and bottom of the body. - Add the face
Draw a simple smiling mouth with a black marker.
Glue small pink circles on the cheeks if you like. - Finish and let it dry
Press everything gently so it sticks well.
Let the frog dry for a few minutes before moving it.
This frog is completely flat, easy to cut, and perfect for kids because there are no small or complicated parts.
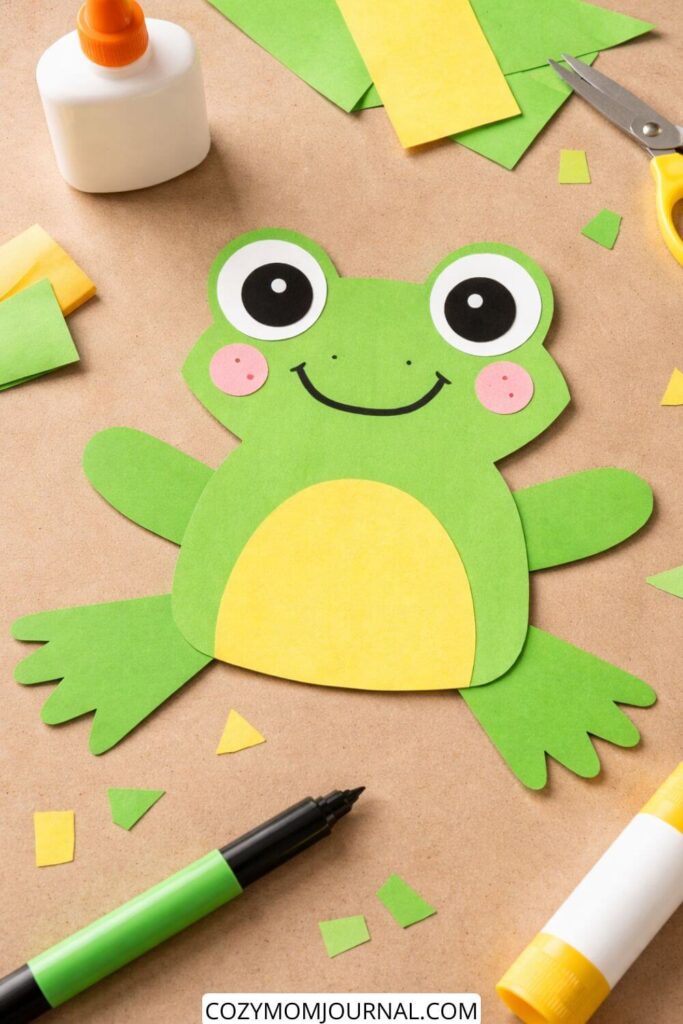
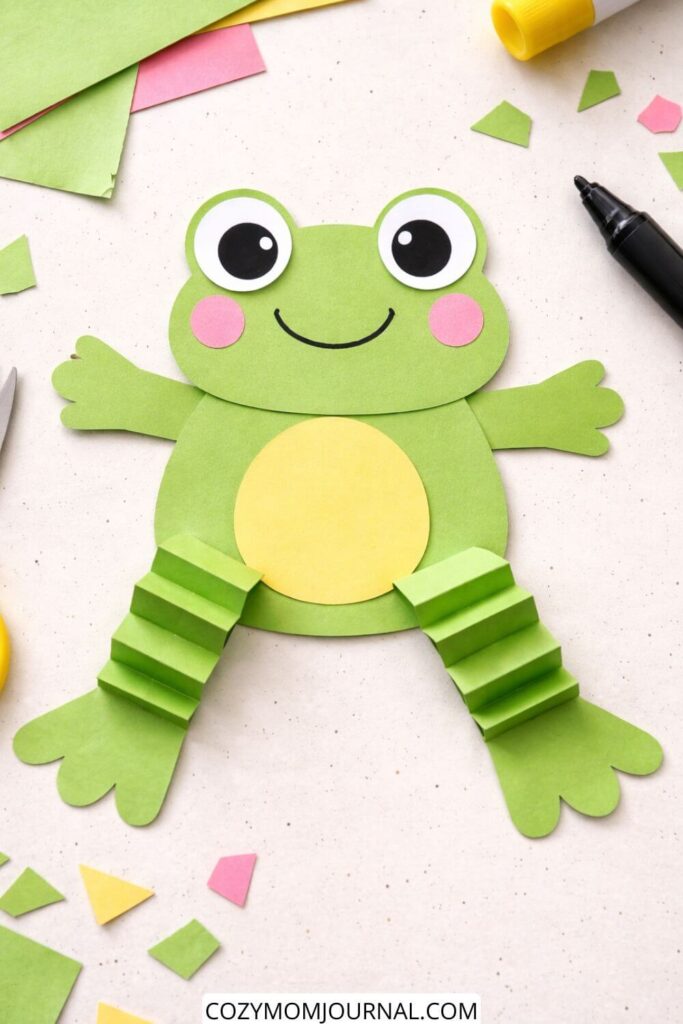
4. Funny Paper Frog
Materials you need
- Green construction paper
- Yellow (or light green) paper for the belly
- White paper for the eyes
- Small scraps of pink paper for the cheeks (optional)
- Black marker pen
- Scissors
- Glue stick or liquid glue
How to make the paper frog
- Cut the body
Cut a large rounded shape from green paper for the frog’s body. Make the top slightly wider for the head and the bottom round. - Add the arms and legs
Cut four simple shapes from green paper: two short arms and two wider legs. Keep them flat and rounded, no details needed. Glue them behind the body. - Make the belly
Cut a half-oval or oval shape from yellow paper and glue it to the center of the frog’s body. - Create the eyes
Cut two white circles for the eyes. Draw black circles inside with a marker. Glue them to the top of the head so they slightly stick out. - Draw the face
Use a black marker to draw a simple smile. Glue small pink paper circles for cheeks, or draw dots with a marker. - Let it dry
Leave the frog flat on the table until the glue dries completely.
This frog is flat, simple, and perfect for kids because it uses only basic shapes and minimal cutting.
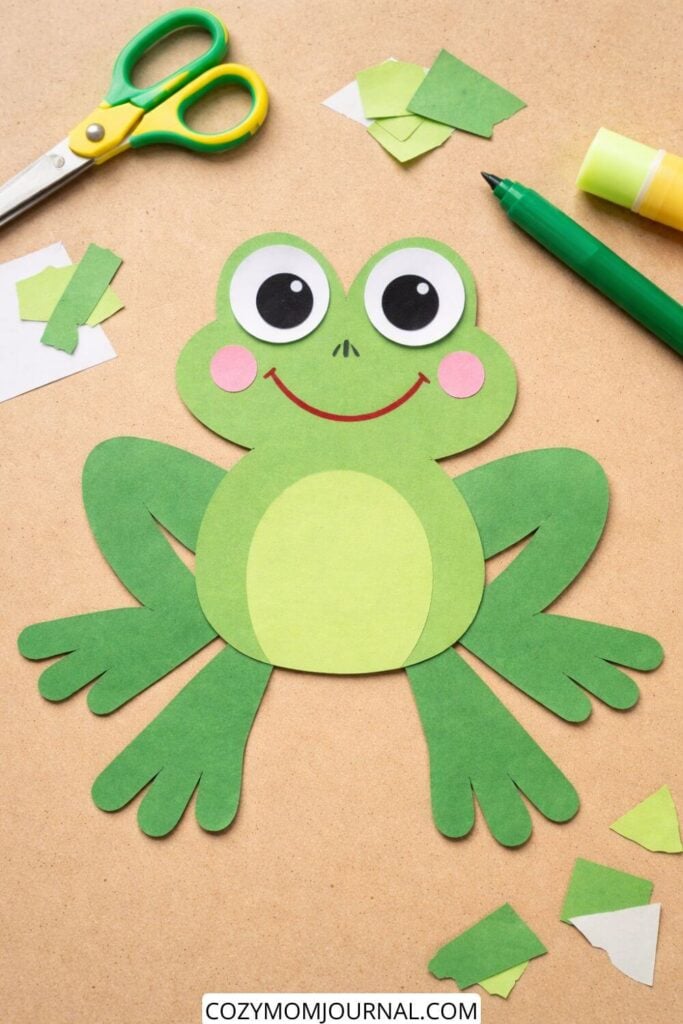
5. Paper Frog with Large Legs
Materials
- Green paper
- White paper (for eyes)
- Black marker pen
- Pink paper scraps (optional, for cheeks)
- Scissors
- Glue stick
How to Make It
- Cut a large oval or rounded shape from green paper for the frog’s head and body.
- Cut two small circles from white paper for the eyes and draw black dots inside them.
- Glue the eyes to the top of the frog’s head.
- Draw a simple smile and a small nose with a black marker.
- Cut four simple flat leg shapes from green paper (no details needed).
- Glue two legs to each side of the body.
- Add small pink circles for cheeks if you like, or draw them with a marker.
- Let everything dry.
This version is perfect for younger kids and quick crafting sessions.
6. Paper Frog with Folded Legs
Materials
- Green paper
- Yellow or light green paper (for the belly)
- White paper (for eyes)
- Black marker pen
- Pink paper scraps (optional)
- Scissors
- Glue stick
How to Make It
- Cut a rounded green shape for the frog’s head and body.
- Cut a circle or oval from yellow or light green paper for the belly and glue it to the center.
- Cut two white circles for eyes and draw black pupils.
- Glue the eyes to the top of the head.
- Draw a simple smile with a black marker.
- Cut two long rectangles from green paper for the legs.
- Fold each rectangle back and forth like an accordion.
- Cut simple foot shapes and glue them to the ends of the folded legs.
- Glue the folded legs to the bottom of the frog’s body.
- Add pink cheeks if desired and let everything dry.
This version adds a fun folding step but stays simple and child-friendly.
Why Paper Frog Crafts Always Work
What I love most about paper frog crafts is how adaptable they are. You can simplify them for younger kids or add extra layers and details for older ones. They work just as well at the kitchen table as they do during a classroom craft session or a playdate.
If you’re short on space, these crafts stay mostly flat.
If you’re short on time, most of them come together in minutes.
If you’re short on energy (I see you), they still feel like a win.
And let’s be honest — frogs are funny. Those big eyes and goofy smiles make kids proud of what they’ve created, even if the cuts aren’t perfect.
Looking for More Easy Animal Crafts?
If your kids enjoyed these paper frog crafts, you’ll probably love a few other animal craft ideas I’ve shared on the blog. These are some of our favorites when we want variety without adding complexity:
- 15 Easy Animal Toilet Paper Roll Crafts Kids Will Love – a great way to reuse materials you already have at home
- 12 Easy Animal Mason Jar Crafts for Kids – perfect when you want something decorative and gift-worthy
I often rotate between these ideas depending on the kids’ mood and the supplies we have on hand.
Let’s Keep Crafting Together
If you’re like me, you’re probably always saving ideas for later — and that’s exactly why I share so many of these projects on Pinterest. You can follow along and bookmark your favorites on my Pinterest page, where I pin creative kids’ crafts, DIY ideas, and easy projects you can actually make work in real life.
You can find me on Pinterest at CozyMomJournal, and I’d genuinely love to see what you create.
Before you go, I want to ask you something:
- Which of these paper frog crafts do you think your kids would love most?
- Did you add your own twist or color combo?
- Would you try a different animal next?
If you make one of these frogs, save it to Pinterest and tag or comment — I love seeing your versions and sharing ideas back and forth. Crafting feels so much better when it becomes a little community instead of a solo project.
And if you ever feel stuck thinking, “I’m not creative enough for this,” trust me — you are. All it takes is one piece of green paper and the willingness to try.