Halloween nails are one of my favorite excuses to have a little more fun with my manicure, because suddenly ghosts, tiny pumpkins, spiderwebs, glitter, and colors I might normally hesitate to wear all feel completely acceptable. Honestly, October might be the only month when I can look at a miniature ghost painted on my nail and think, yes, this is exactly what was missing from my life.
I’ve always loved nails that feel seasonal without looking like a Halloween costume attached to my fingertips. Sometimes I want classic black and orange, but other times I’m much more drawn to soft pink ghosts, deep burgundy polish, chocolate brown, or even pastel purple.
That’s exactly why I put together these Halloween nails. There’s a little bit of everything here: cute, spooky, colorful, minimal, sparkly, and a few designs that are definitely for those days when “just one accent nail” somehow turns into a full miniature art gallery.
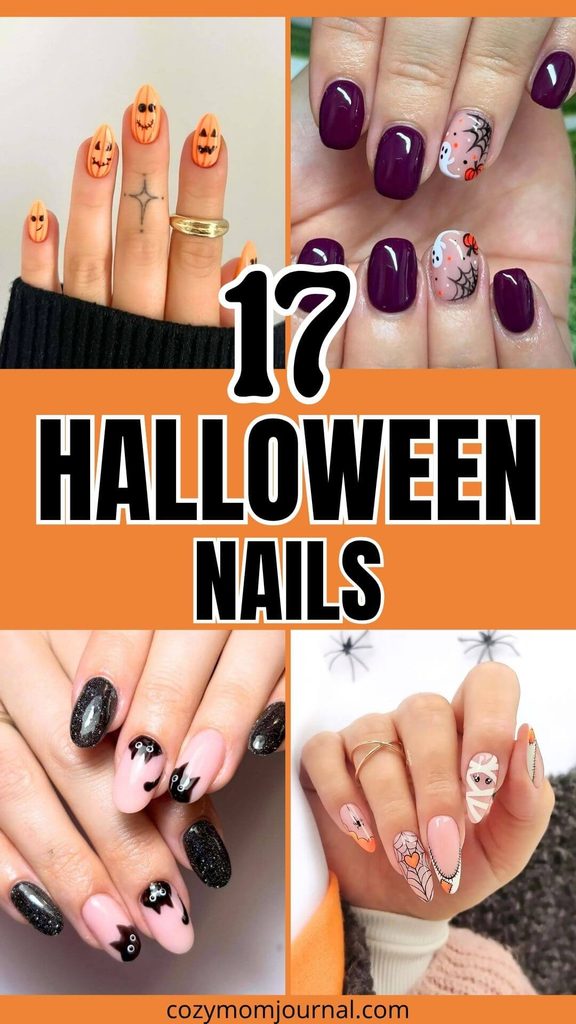
If you’re still deciding what kind of October manicure fits you best, think about three things first:
- How much nail art do you actually want? A tiny ghost on one nail can feel just as festive as ten detailed designs.
- Will you DIY it or visit a nail artist? Fine spiderwebs and 3D details may be easier to save as salon inspiration.
- Do you want obvious Halloween or subtle fall? Burgundy, brown, nude, and soft orange are perfect when you want your manicure to work beyond October 31.
I’ve definitely been in that situation where I save a gorgeous manicure, get excited about recreating it, and then realize there are approximately 47 microscopic details involved. So throughout this collection, I’ve included simpler alternatives and small changes you can make if you love the overall idea but don’t want to spend your entire evening holding a nail-art brush.
And if Halloween isn’t the only excuse you need for a fresh manicure, you’ll probably want to browse my fall nail designs too. I also collected more cozy seasonal inspiration in my autumn nails ideas.
Now comes the difficult part: choosing just one of these Halloween nails.
1. Cozy Ghost and Bat Halloween Nails
Source: Instagram
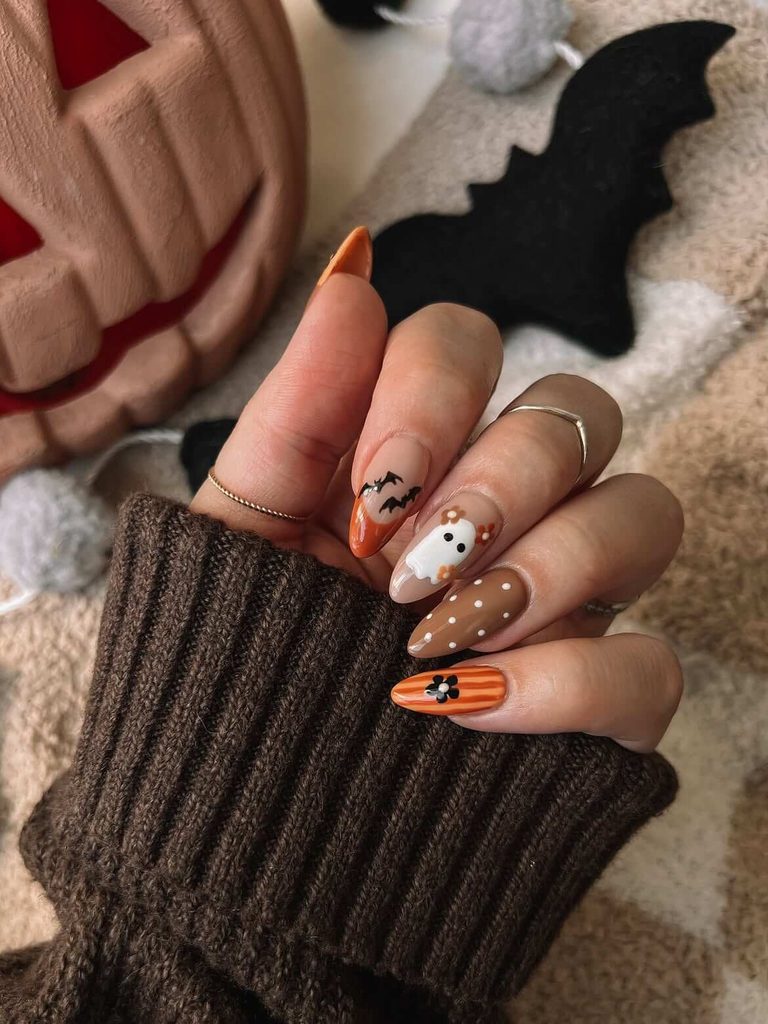
This warm-toned Halloween manicure is perfect if you love spooky details but still want something soft, cute, and wearable. The mix of pumpkin orange, caramel brown, natural, tiny bats, polka dots, and the little white ghost gives the set plenty of personality without making every nail feel overly busy.
For a similar look, stick to a limited autumn palette and let each nail have its own small feature. A sheer nature or milky beige base helps the detailed artwork stand out, while burnt orange and chocolate brown keep everything feeling seasonal.
- Use a fine nail-art brush for the bats, stripes, and tiny floral details.
- Create the ghost with an opaque white polish, then add two small black dots for the eyes once the white layer is completely dry.
- A dotting tool makes the evenly spaced white dots much easier to recreate.
- For a simpler DIY version, choose just two accent nails—one ghost and one bat design—and paint the rest in solid orange and brown shades.
The almond shape works especially well here because it leaves enough space for the illustrations while keeping the overall manicure elegant. A glossy top coat will also help smooth out the layered details and make those rich fall colors look even deeper.
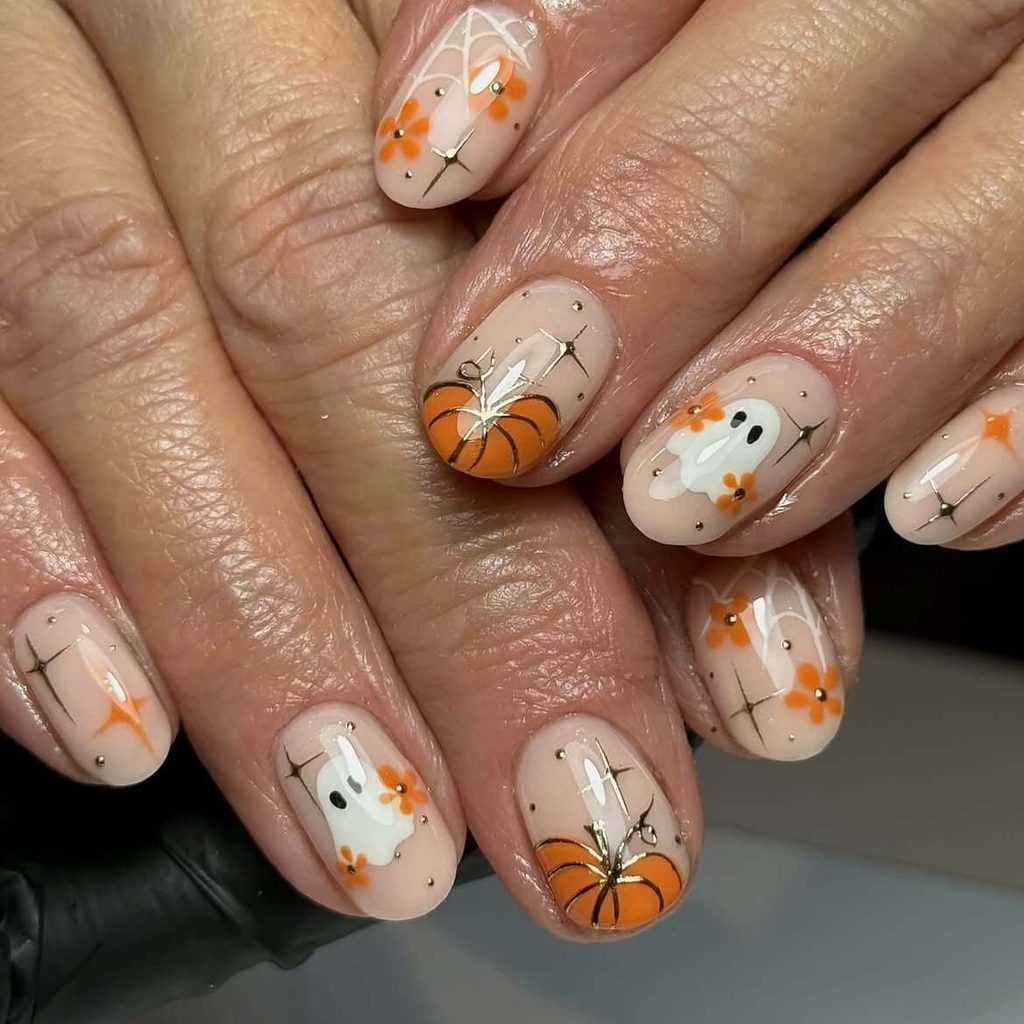
2. Cute Pumpkin and Ghost Halloween Nails
Source: Instagram
Soft natural polish keeps this manicure light and feminine, while the tiny pumpkins, floating ghosts, spiderweb details, and delicate sparkles bring in just enough Halloween charm. The orange floral accents are a fun unexpected touch that makes the whole set feel a little sweeter and less costume-like.
To recreate the look, start with a sheer pink-beige base and build the artwork in thin layers. Keeping most of the nail exposed is what gives the design its clean, airy finish.
- Paint the pumpkins near the tips and add fine curved lines to create dimension.
- Use a small detailing brush for the spiderwebs and ghost outlines.
- Tiny metallic dots or micro studs can add the same subtle sparkle without overwhelming the artwork.
- If you prefer a simpler version, skip the floral accents and alternate pumpkins, ghosts, and starbursts across the nails instead.
This style works especially well on short, rounded nails because the motifs are compact and easy to place. For a slightly more elevated version, swap the orange flowers for tiny gold stars or add a soft chrome top coat over one or two accent nails.
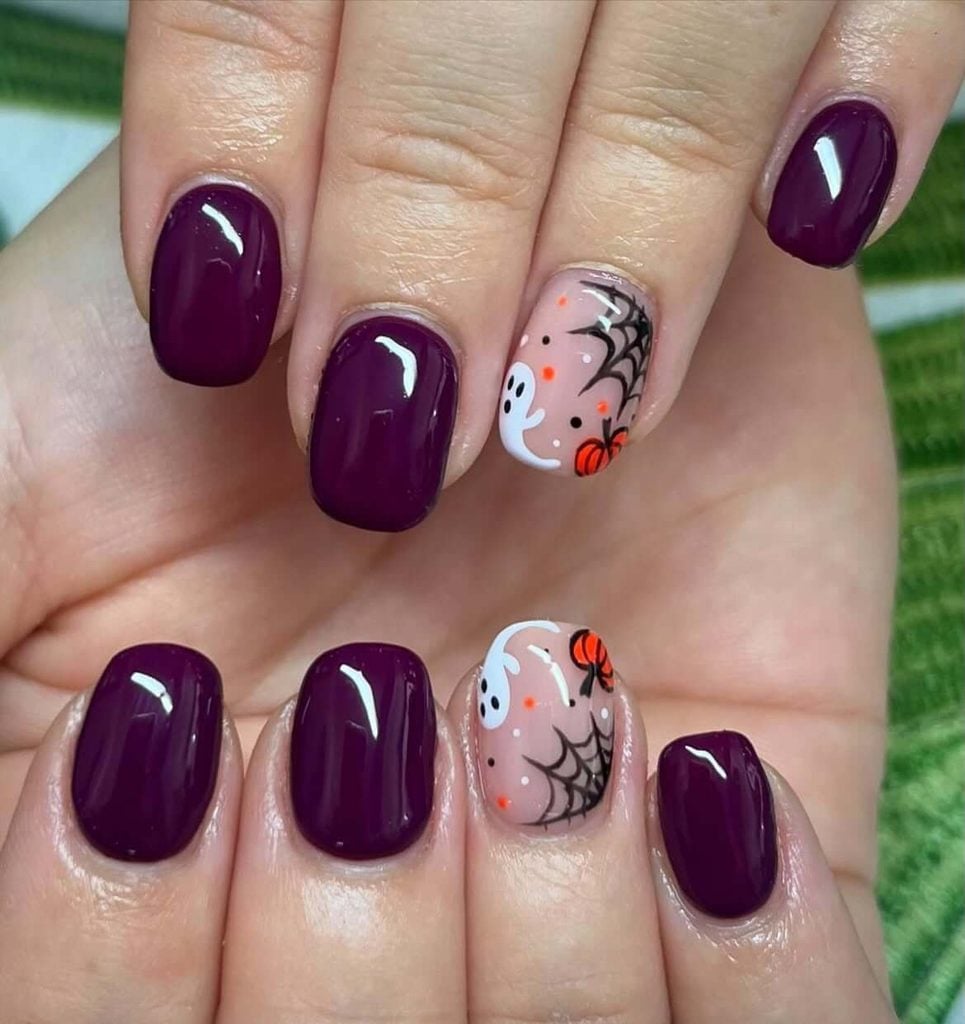
3. Deep Purple Halloween Nails with Ghost Accents
Source: Instagram
A rich plum shade gives this manicure a moodier Halloween feel without relying on classic black. The contrast between the glossy purple nails and the sheer accent nails makes the tiny ghosts, pumpkins, spiderwebs, and dotted details stand out even more.
The easiest way to recreate this set is to keep most nails solid and concentrate the artwork on just one or two accents per hand. That gives you a detailed look without having to paint a miniature Halloween scene on every nail.
- Choose a deep eggplant or blackberry polish for the solid nails.
- Use a sheer blush or natural base for the accent nails so the artwork stays crisp and visible.
- Paint the spiderweb first with an ultra-fine liner brush, then add the ghost and pumpkin around it to keep the composition balanced.
- Tiny orange, black, and white dots are an easy way to fill empty spaces without making the design look crowded.
If freehand nail art feels intimidating, ghost and pumpkin decals can give you a very similar result. You could also swap the plum for burgundy, navy, or even dark forest green for a different take on the same layout.
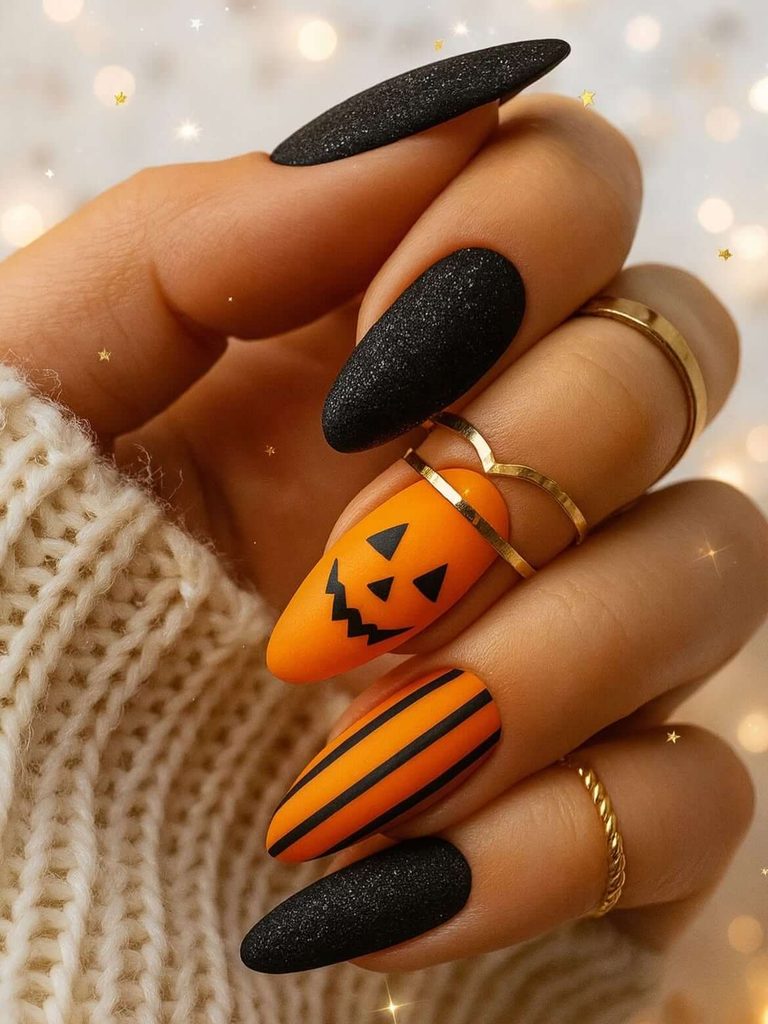
4. Matte Jack-o’-Lantern Halloween Nails
Source: Instagram
Bold orange and black instantly give this manicure a classic Halloween feel, but the matte finish makes it look cleaner and more modern. The jack-o’-lantern face brings in the playful seasonal detail, while the striped accent nail keeps the set graphic rather than overly themed.
A smooth matte top coat is key here, especially on the black nails, because it gives the manicure that soft velvet-like finish. For the orange nails, choose a warm pumpkin shade with strong coverage so the black details look crisp on top.
- Paint the jack-o’-lantern face with a very fine liner brush or use nail vinyls if you want sharper edges.
- Striping tape is the easiest way to create the straight black lines on the orange accent nail.
- Let the design dry fully before applying matte top coat to avoid smudging the black details.
- For extra contrast, leave one orange nail glossy while keeping the rest matte.
This color combination also works beautifully on shorter nails—just simplify the pumpkin face and use one or two thin stripes instead of several. If you want a slightly darker variation, swap the bright orange for burnt pumpkin or terracotta.
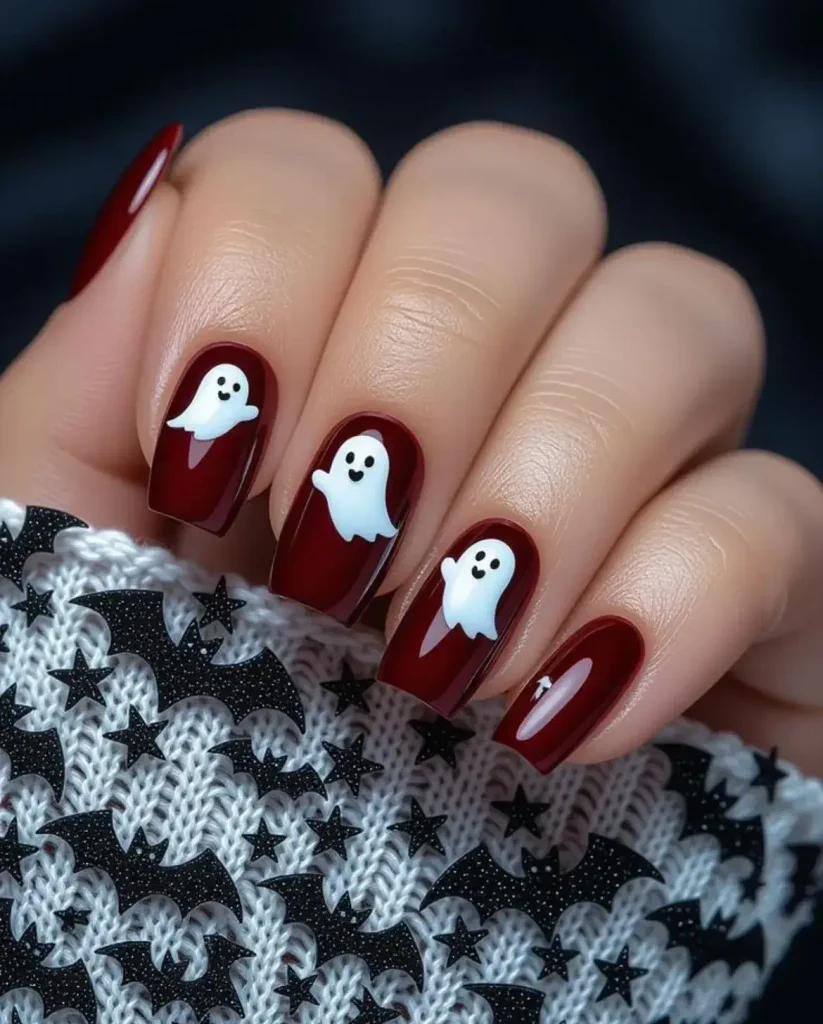
5. Burgundy Ghost Halloween Nails
Source: Instagram
Deep burgundy gives this ghost manicure a richer, more polished feel than the usual black-and-white Halloween palette. The tiny white ghosts keep it playful, while the glossy finish and simple color scheme make the whole set feel clean and wearable rather than overly themed.
Because the background color does most of the work, the ghost shapes can stay very simple. Paint small rounded white forms with slightly uneven bottoms, then add tiny black eyes and mouths for expression.
- Keep the ghosts in slightly different poses so the set feels more lively.
- A dotting tool works well for the facial features and helps keep them neat.
- Use a highly pigmented white polish so the ghosts stay bright over the dark base.
- For an easier version, place ghost decals on two or three nails and leave the rest solid burgundy.
This idea is especially good if you want Halloween nails that still feel sophisticated. A deep cherry red, oxblood, or wine shade would create a similar effect, and the look can easily be adapted to short square nails, almond shapes, or longer coffin nails.
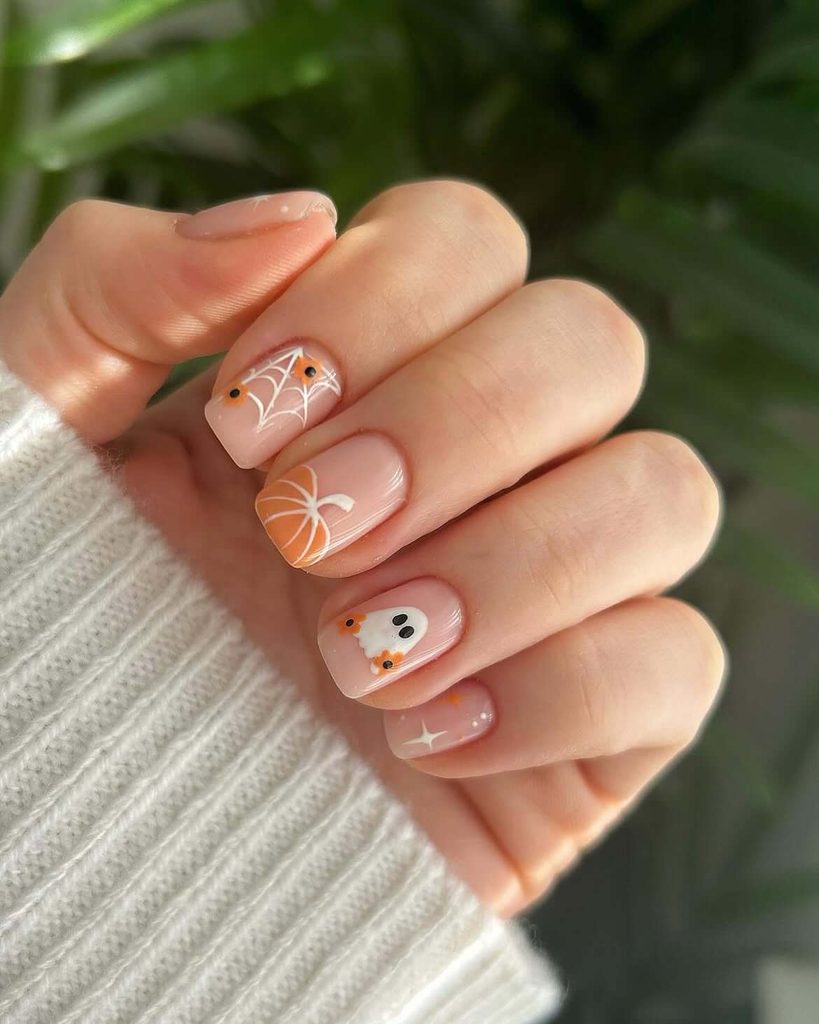
6. Minimal Halloween Nails with Pumpkin and Ghost Details
Source: Instagram
This softer Halloween set proves you do not need dark polish to make a seasonal manicure feel festive. The sheer natural base keeps everything clean and delicate, while the white spiderweb, outlined pumpkin, tiny ghost, and subtle star details add just enough character.
The biggest trick here is keeping the line work thin and precise. A fine liner brush and a dotting tool will give you much more control than a standard polish brush, especially for the web and small facial features.
- Use a translucent pink or beige base instead of an opaque natural for the same light, airy effect.
- Outline the pumpkin with white rather than black to keep the design soft and cohesive.
- Add tiny black dots sparingly so they act as accents instead of competing with the artwork.
- If you want an even simpler version, choose only the ghost and spiderweb designs and leave the remaining nails sheer with small white stars.
Short square nails are especially well suited to this layout because each motif can sit neatly in one corner without feeling cramped. You could also replace the orange accents with muted peach, rust, or soft brown for a more understated fall-inspired variation.
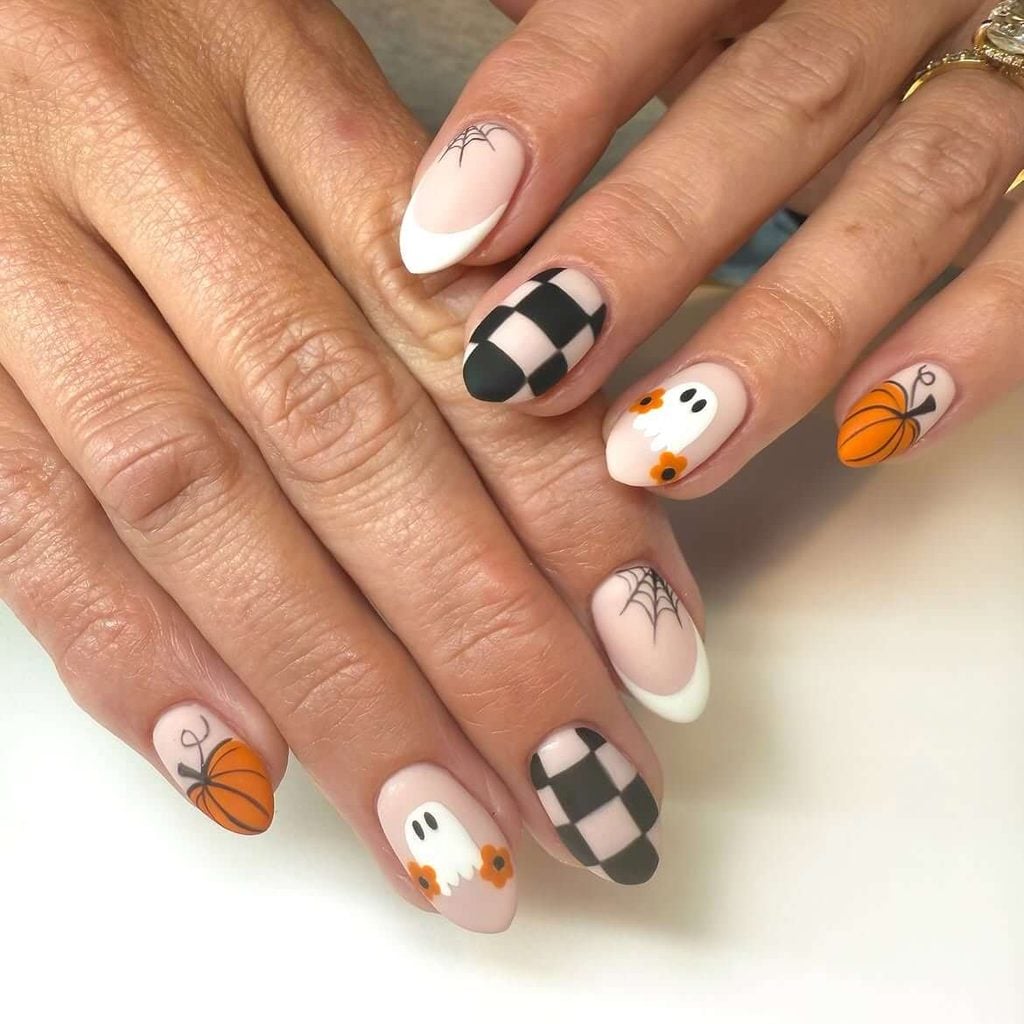
7. Checkered Pumpkin and Ghost Halloween Nails
Source: Instagram
This set mixes several Halloween motifs without feeling chaotic because the colors stay tightly coordinated. Soft nature, crisp white, black checkerboard accents, orange pumpkins, tiny spiderwebs, and cute ghosts all work together to create a playful look with a slightly retro feel.
The checkerboard nails are what make this design stand out, so keeping the surrounding artwork lighter helps everything stay balanced.
- Use striping tape or a very fine brush to map out the black checkerboard before filling in each square.
- Keep the ghost shapes simple and rounded, then add tiny black oval eyes for an easy, expressive finish.
- Paint the pumpkins with curved black lines rather than heavy outlines so they still feel delicate.
- French tips and spiderweb details are a good way to add variety without introducing another color.
For a more understated version, use the checkerboard pattern on only one nail per hand and keep the rest natural with small pumpkin or ghost accents. A matte top coat would also give the black-and-orange details a softer, more graphic finish.
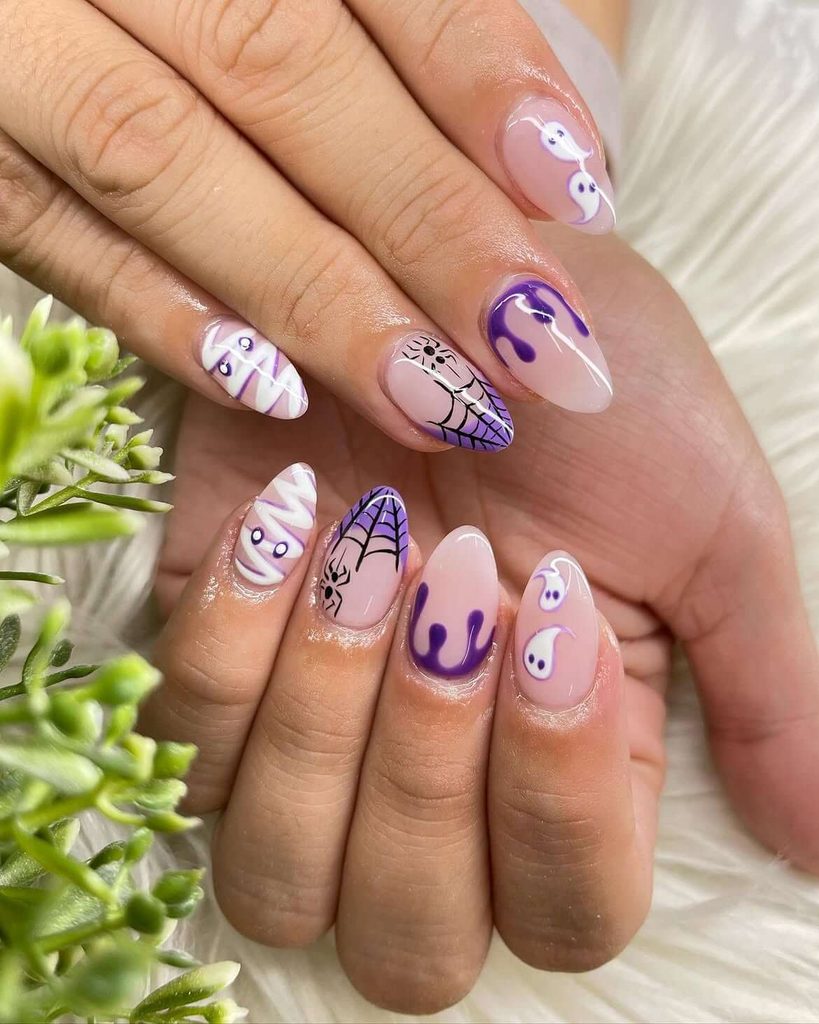
8. Purple Drip and Spiderweb Halloween Nails
Source: Instagram
Purple gives this Halloween manicure a fun twist on the usual orange-and-black palette. The combination of dripping tips, wispy spiderwebs, tiny ghosts, and mummy-inspired details feels playful and a little quirky, while the sheer natural base keeps the set from looking too heavy.
The key to recreating this style is to vary the artwork from nail to nail while repeating the same purple, white, and black color palette throughout.
- Create the dripping effect with a dotting tool first, then connect the dots with a small brush to form smooth rounded drips.
- For the mummy nails, paint thin white diagonal bands and leave a small opening for the eyes.
- Use a liner brush for the spiderwebs, starting with a few long guide lines before adding the curved sections.
- Keep the little ghosts simple and slightly different in shape so they feel hand-painted rather than identical.
If you want to make the set easier at home, choose just three motifs—drips, ghosts, and spiderwebs—and repeat them across both hands. Lavender, deep violet, or even neon purple could also completely change the mood while keeping the same overall concept.
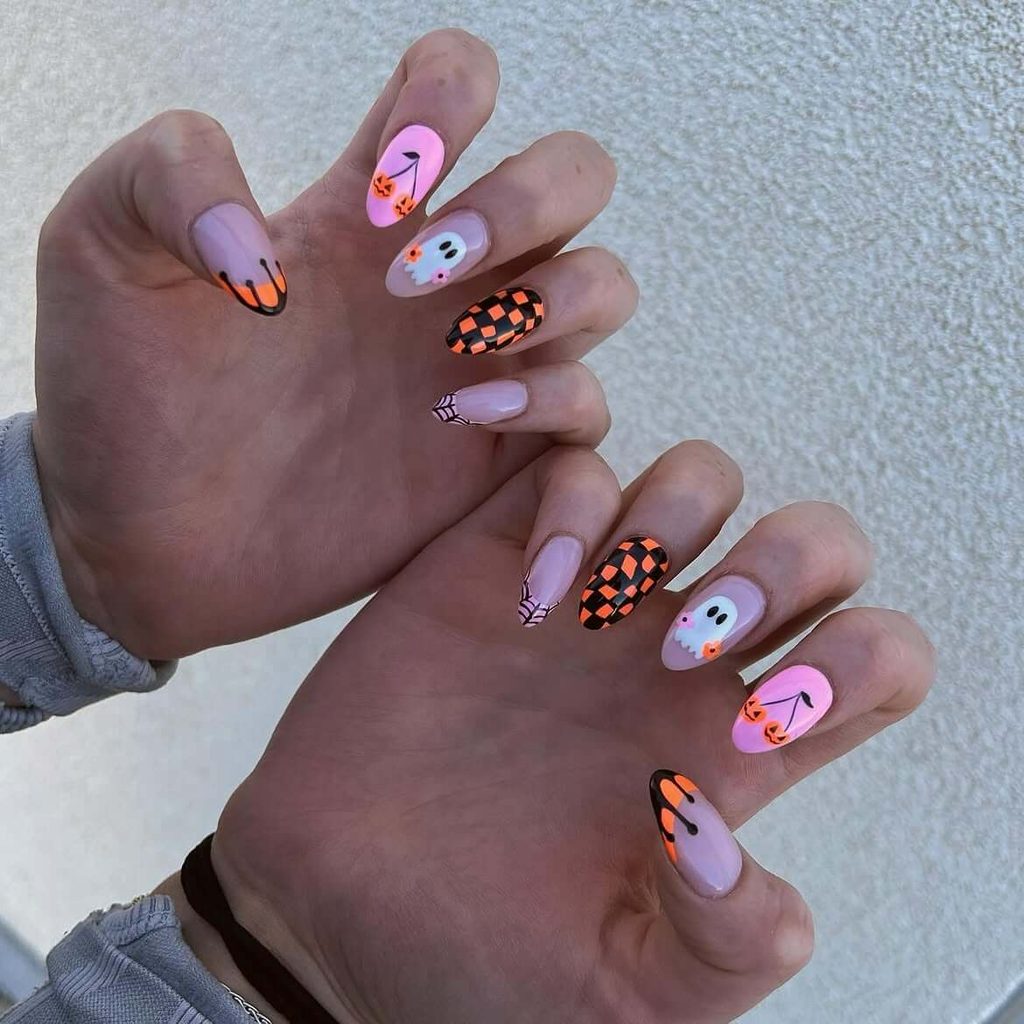
9. Neon Pink and Orange Halloween Nails
Source: Instagram
Bright pink and vivid orange give this Halloween set a playful, almost candy-colored twist. The mix of jack-o’-lantern cherries, cute ghosts, dripping tips, checkerboard patterns, and tiny spiderweb accents makes the manicure feel fun and energetic without relying on the usual dark Halloween palette.
Because several patterns are competing for attention, the neutral pink base is important—it gives your eye somewhere to rest and helps the neon details look even brighter.
- Use a black liner brush to sketch the checkerboard grid first, then fill alternating sections with orange.
- For the dripping tips, place rounded blobs of color along the edge and connect them with curved lines for a smoother effect.
- Keep the ghost faces very simple so they do not get lost next to the bolder patterns.
- The pumpkin “cherries” are a cute extra detail: paint two tiny orange jack-o’-lanterns and connect them with thin black stems.
If you want to tone the look down, keep the checkerboard and spiderweb nails but replace the neon shades with muted coral and dusty pink. On the other hand, adding a glossy top coat over the bright accents will make the colors feel even more vibrant and graphic.
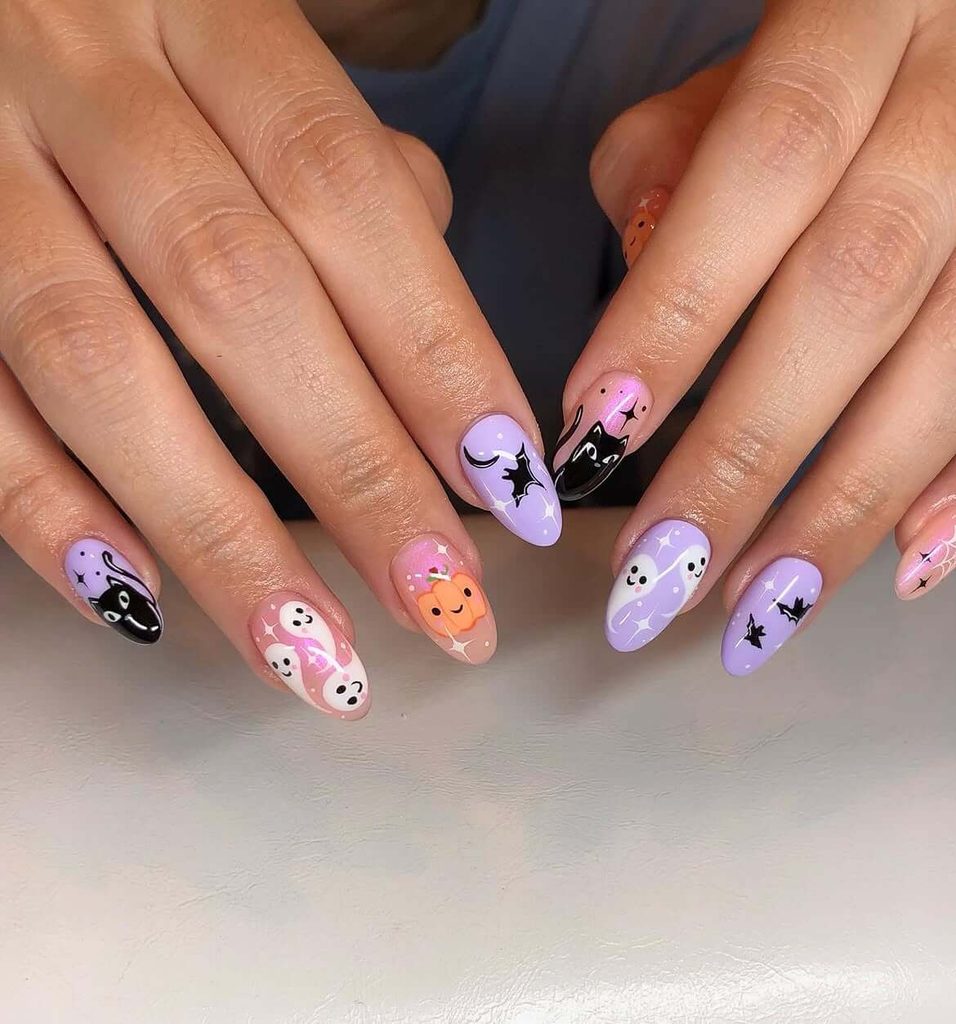
10. Pastel Halloween Nails with Cats, Ghosts, and Bats
Source: Instagram
Lavender, blush pink, and soft peach give this set a dreamy Halloween look that feels more whimsical than spooky. Black cats, tiny bats, floating ghosts, a smiling pumpkin, and scattered starbursts create a storybook effect, while the pastel background keeps everything light and playful.
The easiest way to make a mixed-character manicure like this feel cohesive is to repeat a few visual elements across the set. Here, black outlines, white highlights, and small sparkles tie together all the different illustrations.
- Use two or three pastel base shades instead of making every nail a different color.
- Paint the larger characters first, then fill empty areas with tiny stars, dots, or sparkles.
- Keep cat and ghost faces minimal so they stay readable even on smaller nails.
- A thin detailing brush is especially helpful for tails, bat wings, and tiny facial features.
If you love the overall vibe but want something easier to recreate, choose one character theme—such as black cats or ghosts—and repeat it across several nails with different poses. A subtle shimmer or pearl top coat would also work beautifully with this softer Halloween color palette.
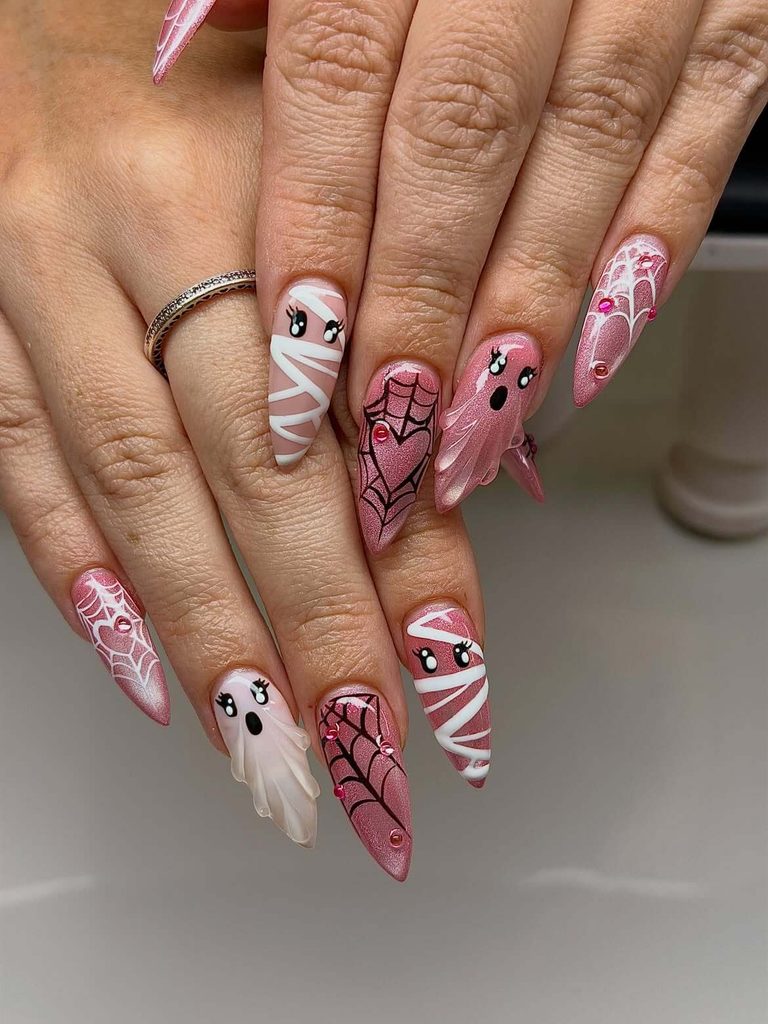
11. Pink Glam Halloween Nails with Mummies and 3D Ghosts
Source: Instagram
Pink gives this Halloween manicure a glam, playful personality, while the mummy wraps, spiderwebs, rhinestones, and sculpted ghosts add plenty of spooky detail. The mix of soft shimmer, crisp white accents, and black line work keeps the design feminine without losing the Halloween theme.
This set is all about texture, so layering matters. Start with the pink base and flat artwork first, then add raised ghost details or embellishments last so the surface stays clean and dimensional.
- Use thin white gel lines to build the mummy wraps, leaving small gaps for the eyes.
- Draw spiderwebs with a fine liner brush, then add rhinestones at selected intersections for extra sparkle.
- For the 3D ghosts, builder gel or sculpting gel can create the lifted, flowing shape.
- Keep the black facial details tiny and expressive so the characters stay cute rather than too dramatic.
- If you want a more wearable version, use the 3D ghost effect on just one accent nail and keep the rest flat.
Long almond or stiletto nails give this kind of artwork more room, but the same color palette would also work on shorter nails with simplified mummy and web details. A pearly or magnetic pink base is another easy way to make the manicure feel even more dimensional.
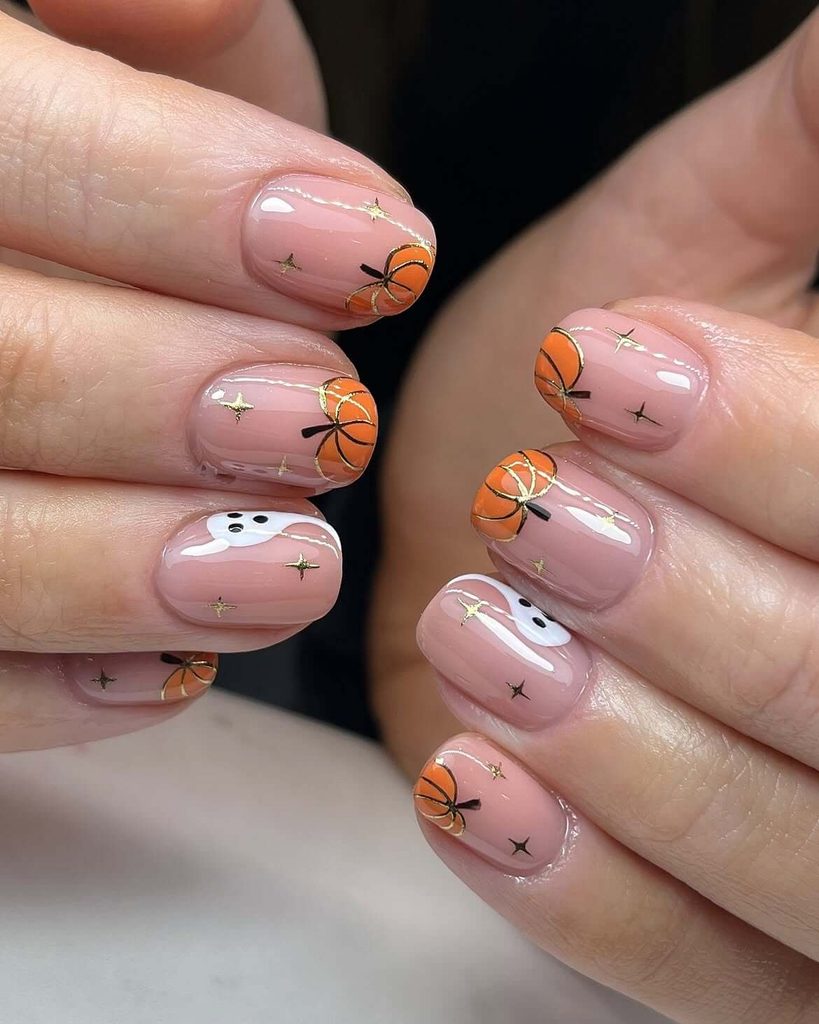
12. Blush Pink Halloween Nails with Tiny Pumpkins and Peeking Ghosts
Source: Instagram
If you want a Halloween manicure that feels polished, delicate, and easy to wear every day, this one is such a pretty option. The blush pink base keeps everything soft and feminine, while the tiny corner pumpkins, peeking ghosts, and gold star accents add just enough seasonal charm.
What makes this look stand out is the placement. Instead of covering the whole nail with art, the details are tucked into the corners, which keeps the manicure feeling clean and modern.
- Use a sheer rosy natural or jelly pink base for that glossy, natural-looking finish.
- Paint the pumpkins along the edge of the nail to create a subtle framed effect rather than a full accent nail.
- Add a few tiny metallic gold stars or foil details to make the set feel a little more special.
- Keep the ghost design simple—just a soft white shape with minimal black dots for the face.
Short rounded nails work especially well for this style because the artwork looks neat and balanced without needing a lot of space. If you want to dress it up even more, a fine gold outline around the pumpkins or a milky shimmer top coat would make the whole manicure feel extra chic.
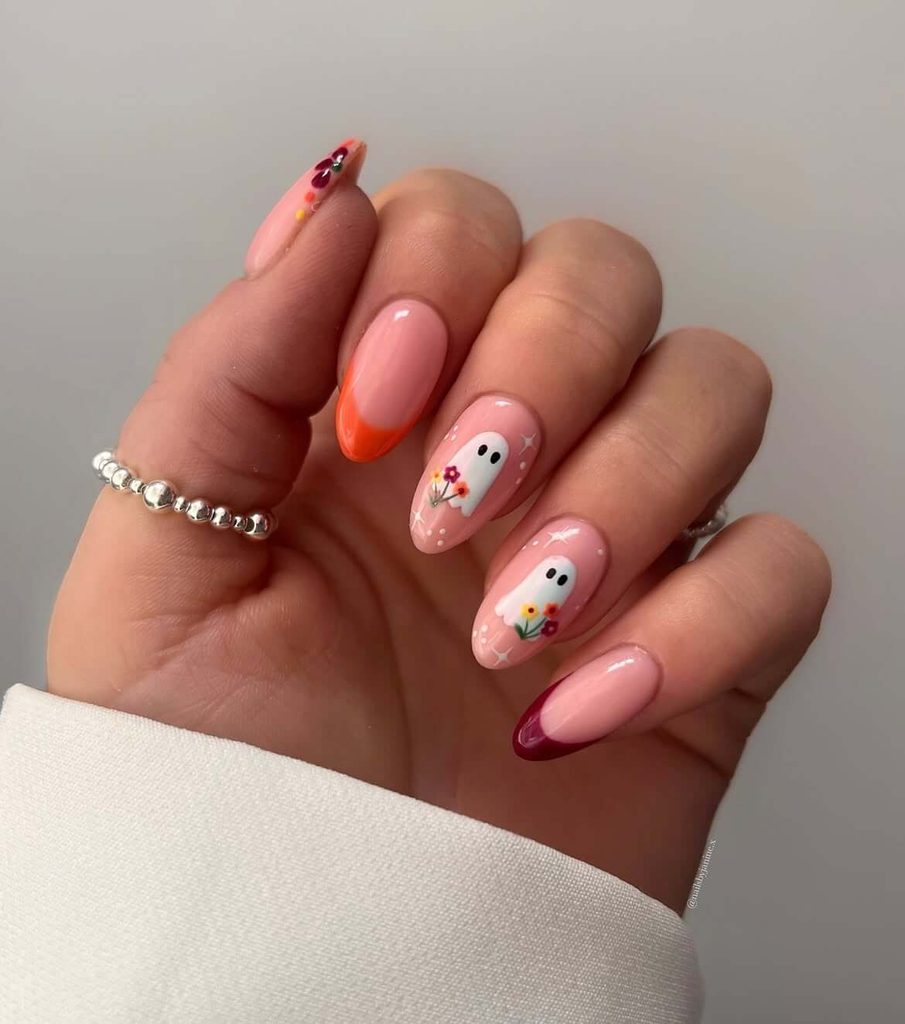
13. Floral Ghost Halloween Nails with Colorful French Tips
Source: Instagram
These sweet little ghosts feel more charming than spooky, especially paired with tiny bouquets and a glossy blush-pink base. The mismatched French tips in orange and deep berry add a modern fall touch, while the small white sparkles keep everything light and whimsical.
What makes this set especially pretty is the contrast between the simple ghost shapes and the more detailed floral accents. The flowers add color without taking over the Halloween theme, so the overall look still feels balanced.
- Paint the ghosts in opaque white first, then add tiny black oval eyes once the base is fully dry.
- Use a dotting tool for the flower centers and a fine brush for the tiny petals and green stems.
- Keep the French tips thin and curved to match the soft almond shape.
- Add a few white stars or dots around the accent nails to fill negative space without making them busy.
For an easier DIY version, keep the floral detail on just one ghost nail and leave the other ghost plain. You could also switch the berry tip to chocolate brown or plum for a moodier fall color combination.
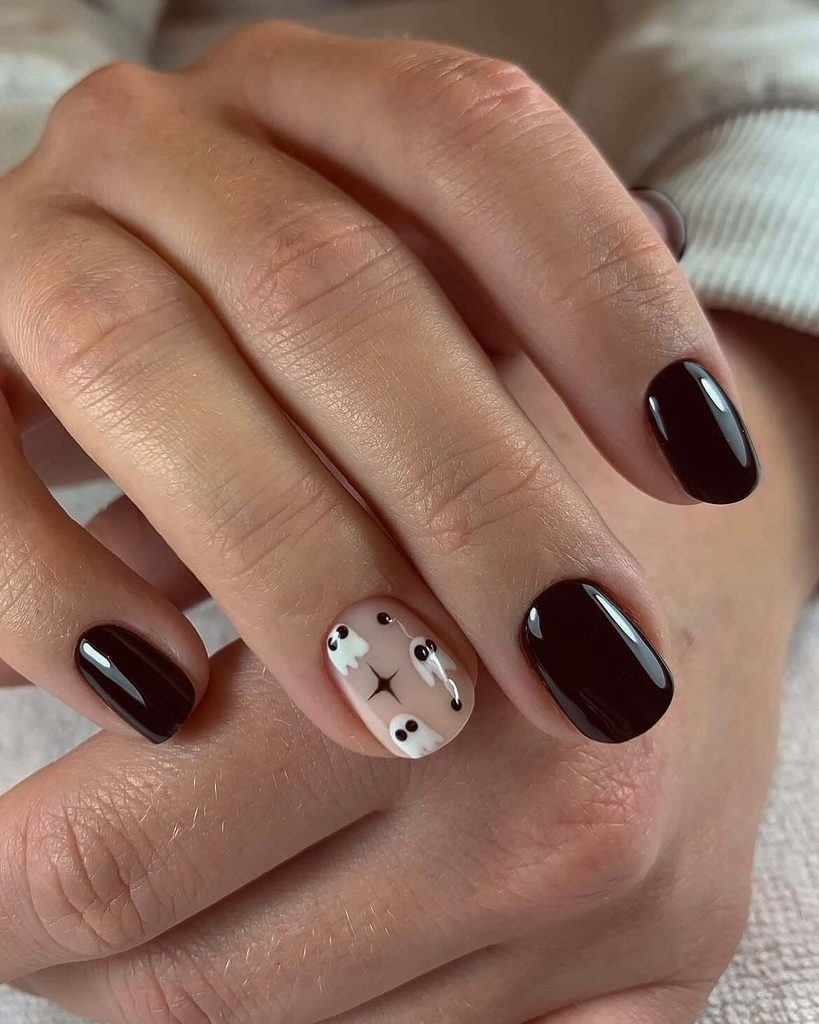
14. Chocolate Brown Ghost Accent Halloween Nails
Source: Instagram
Deep chocolate brown makes this manicure feel cozy and seasonal, while the single natural accent nail keeps the Halloween theme subtle. The tiny white ghosts peeking in from different directions add personality without overpowering the rich, glossy base color.
This is a great option if you prefer simple nail art or want something that can transition easily from Halloween into the rest of fall.
- Choose a dark espresso, chocolate, or oxblood-brown polish with a high-shine finish for the solid nails.
- On the accent nail, place the ghosts partly off the edges instead of centering them for a more playful composition.
- Use a small dotting tool for the dark eyes and tiny facial details.
- Add one simple starburst or sparkle in the empty space to balance the design without making it feel crowded.
You can make the look even more minimal by painting just one ghost on the accent nail, or add a second decorated nail with a tiny moon or spiderweb. The short rounded shape also makes this design especially practical for everyday wear.
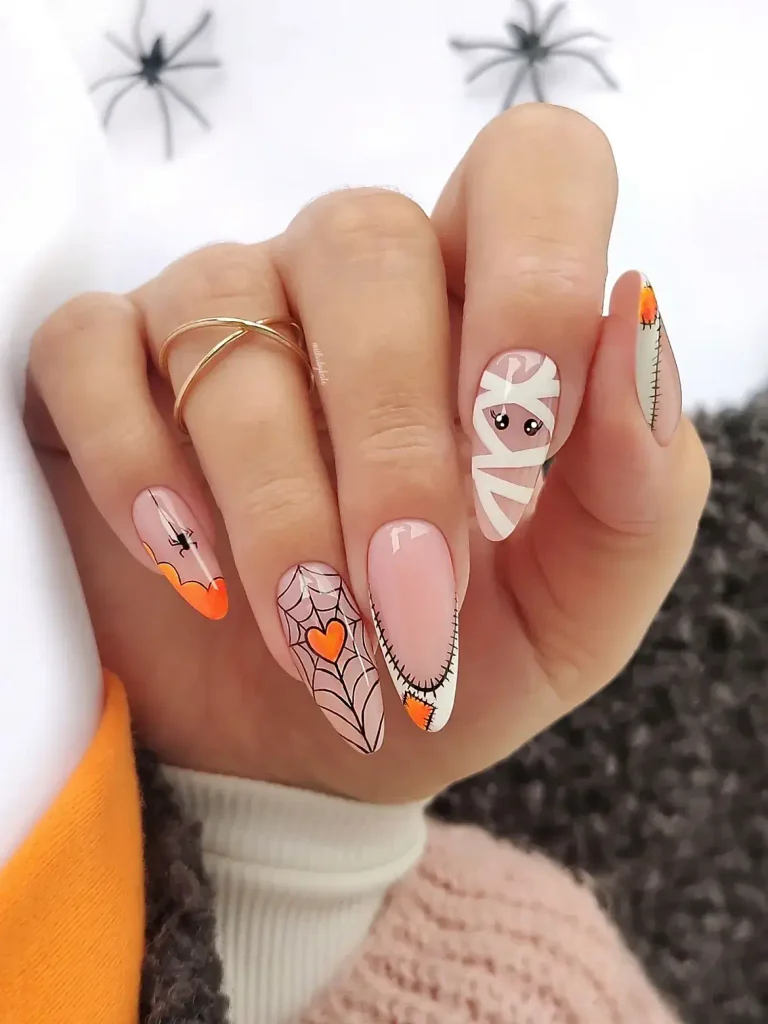
15. Mummy and Spiderweb Halloween Nails with Orange Accents
Source: Instagram
This design has a fun stitched-together look that feels a little spooky, a little playful, and very Halloween. The wrapped mummy, heart-centered spiderweb, orange French details, and tiny stitched borders all bring different elements into the set without making it feel disconnected.
The natural base is what keeps the manicure balanced, so the black linework and orange accents can stand out without overwhelming the nails.
- Build the mummy with overlapping white bands and leave a small opening for the eyes.
- For the spiderweb nail, sketch the main lines first, then connect them with curved sections before adding the orange heart in the center.
- Use a liner brush to create the tiny stitch marks along the edges of the French tips.
- Keep the orange details concentrated near the tips so the manicure still feels clean and cohesive.
If you want a simpler version, use the mummy as your main accent nail and repeat the stitched French tips across the rest of the hand. You could also replace the orange with burnt red or deep purple for a darker variation while keeping the same playful stitched theme.
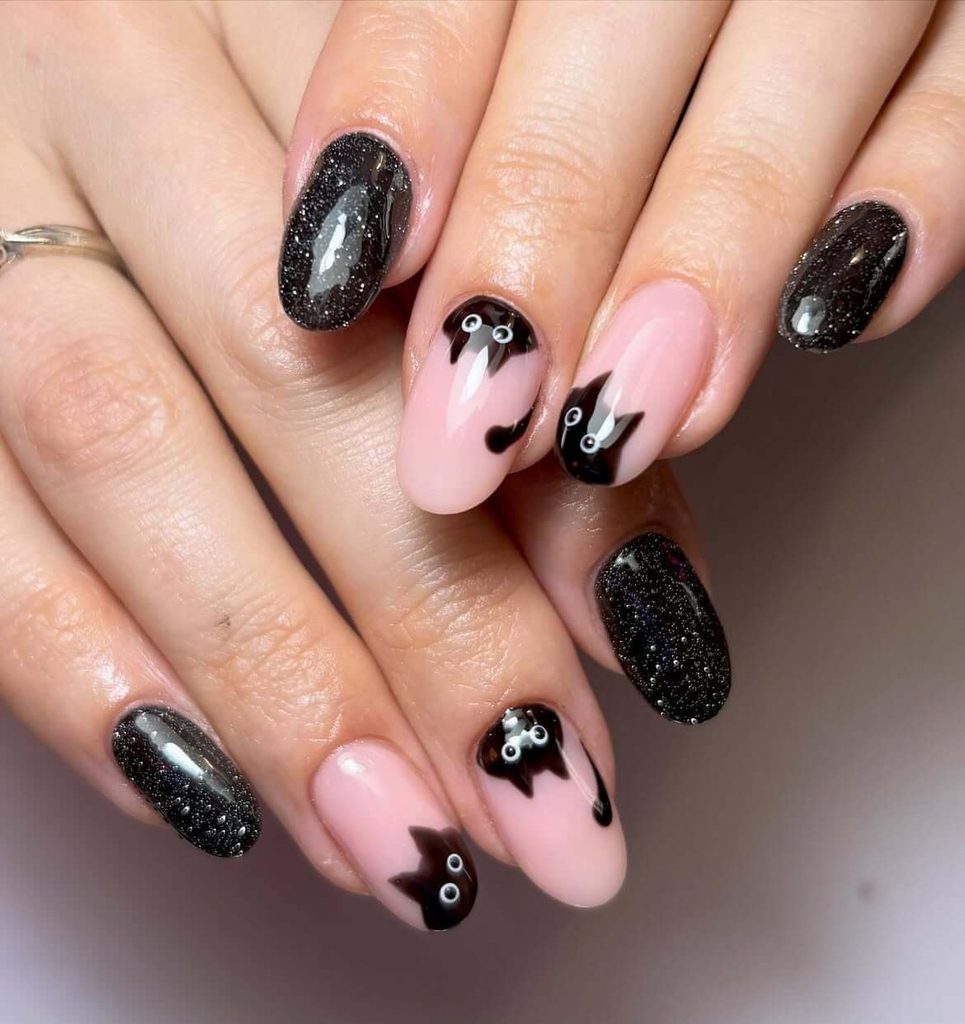
16. Black Cat Halloween Nails with Glitter Accents
Source: Instagram
These glossy black cats make a cute focal point against the soft pink base, while the glittery black nails add just enough drama to make the set feel festive. The contrast between sweet cartoon cat faces and the darker sparkle keeps the manicure playful without losing that Halloween mood.
The cat details are easiest to build from simple shapes rather than trying to paint the whole character at once. Start with the head and ears, add the tail or body, then finish with the tiny eyes.
- Use a pale blush base so the black artwork looks sharp and easy to see.
- Create the eyes with a dotting tool for cleaner, more even circles.
- Add the cat shapes near the tips or cuticle area instead of centering every design.
- Use fine black glitter polish on the solid nails to add texture without introducing another color.
For a simpler version, paint just one cat accent nail on each hand and keep the rest black and pink. You could also swap the glitter for a glossy jet-black polish if you want a sleeker, more minimal finish.
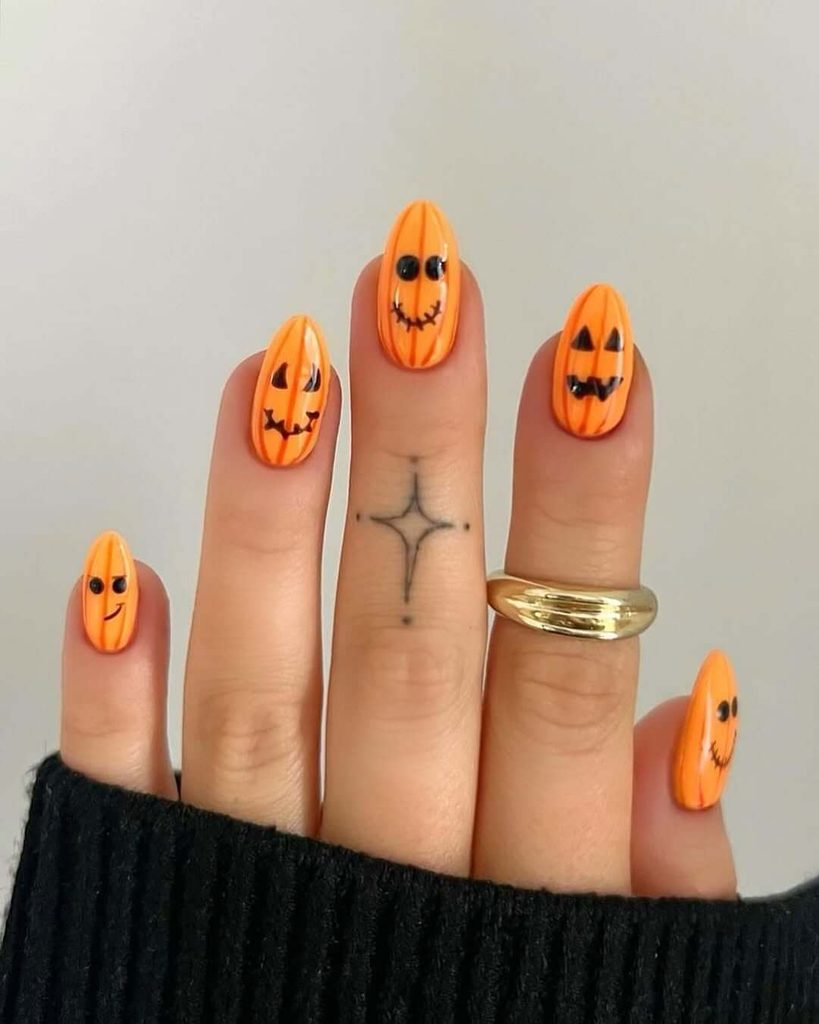
17. Jack-o’-Lantern Face Halloween Nails
Source: Instagram
Nothing says Halloween quite like a full set of bright orange jack-o’-lantern nails. Instead of repeating the exact same face on every finger, this version mixes different expressions—smiling, stitched, spooky, and slightly mischievous—which makes the manicure feel much more playful.
To get the pumpkin effect, start with a saturated orange base and add a few thin darker-orange vertical lines to mimic the natural ridges of a pumpkin. Once that is dry, use black polish to create a different face on each nail.
- Mix round eyes, triangle eyes, stitched smiles, and jagged mouths so every pumpkin has its own personality.
- A fine liner brush works best for the facial details, while a dotting tool makes perfectly round eyes much easier.
- Keep the darker pumpkin lines subtle so they add dimension without competing with the faces.
- If an entire orange set feels too bold, use the jack-o’-lantern design on two or three accent nails and paint the others glossy black.
This idea is especially fun because it can be customized so easily. Try a matte orange finish for a softer pumpkin texture, or add tiny gold highlights if you want the set to feel a little more polished while keeping the classic Halloween look.
Which Halloween Nails Would You Actually Wear?
After looking through all 17 ideas, I think my favorite thing about Halloween nails is how differently you can interpret the theme. You absolutely don’t have to cover every nail in orange pumpkins and black spiderwebs—unless that happens to be exactly what you want, in which case I fully support the commitment.
A single tiny ghost on a nude manicure can feel just as Halloween-ready as a dramatic black glitter set. Pink, purple, burgundy, brown, and even soft pastels also make surprisingly good Halloween colors when you pair them with the right little details.
If you’re choosing between several ideas, this is the approach I’d use:
- Pick the color palette first.
- Choose one main motif such as ghosts, pumpkins, cats, or spiderwebs.
- Add one smaller repeating detail, like stars, dots, French tips, or glitter.
- Simplify anything that looks beautiful but unrealistic for your nail length or skill level.
That last point is one I’ve learned to appreciate more and more. Nail inspiration should be fun, not a tiny personal challenge designed to make you question why you ever bought a detail brush.
If you recreate one of these Halloween nails, don’t feel like you need to copy every element exactly. Change the colors, move the artwork to different nails, turn a full design into an accent nail, or combine details from two of your favorites. Some of the prettiest manicures start with “I like this one, but what if…”
And once the manicure is done, you might as well keep the Halloween planning going. My Halloween Boo Basket Ideas are perfect if you’re putting together a little seasonal surprise for someone—or, frankly, if you just want an excuse to buy cute fall things.
For even more nail ideas, journaling inspiration, seasonal crafts, and cozy finds, follow Cozy Mom Journal on Pinterest. I’m always collecting new ideas there, and it’s probably the easiest place to save your favorites for later.
So now I want to know: which of these Halloween nails would you choose for your own October manicure? Are you a cute-ghost person, a classic jack-o’-lantern person, or are you going straight for the glitter and spiderwebs?
If you try one of these designs, come find me on Pinterest and share which idea inspired you. I’d genuinely love to see how you make it your own.